The Exposure Triangle Explained: Aperture, Shutter Speed & ISO for Landscape Photography
The exposure triangle is how aperture, shutter speed, and ISO work together to control a photograph's exposure. In exposure triangle photography these three settings — sometimes called the three variables — work as one: think of it like the human eye, where aperture is the iris, shutter speed the blink, and ISO the sensitivity. For landscape photographers, balancing these three camera settings is what turns a flat snapshot into a sharp, properly exposed image.
This guide is for landscape and nature photographers who want to leave Auto behind and take deliberate control of exposure. Below, each of the three settings is broken down for landscape work, then combined into practical, scenario-based strategies for the field.
The Exposure Triangle: Foundation of Landscape Photography
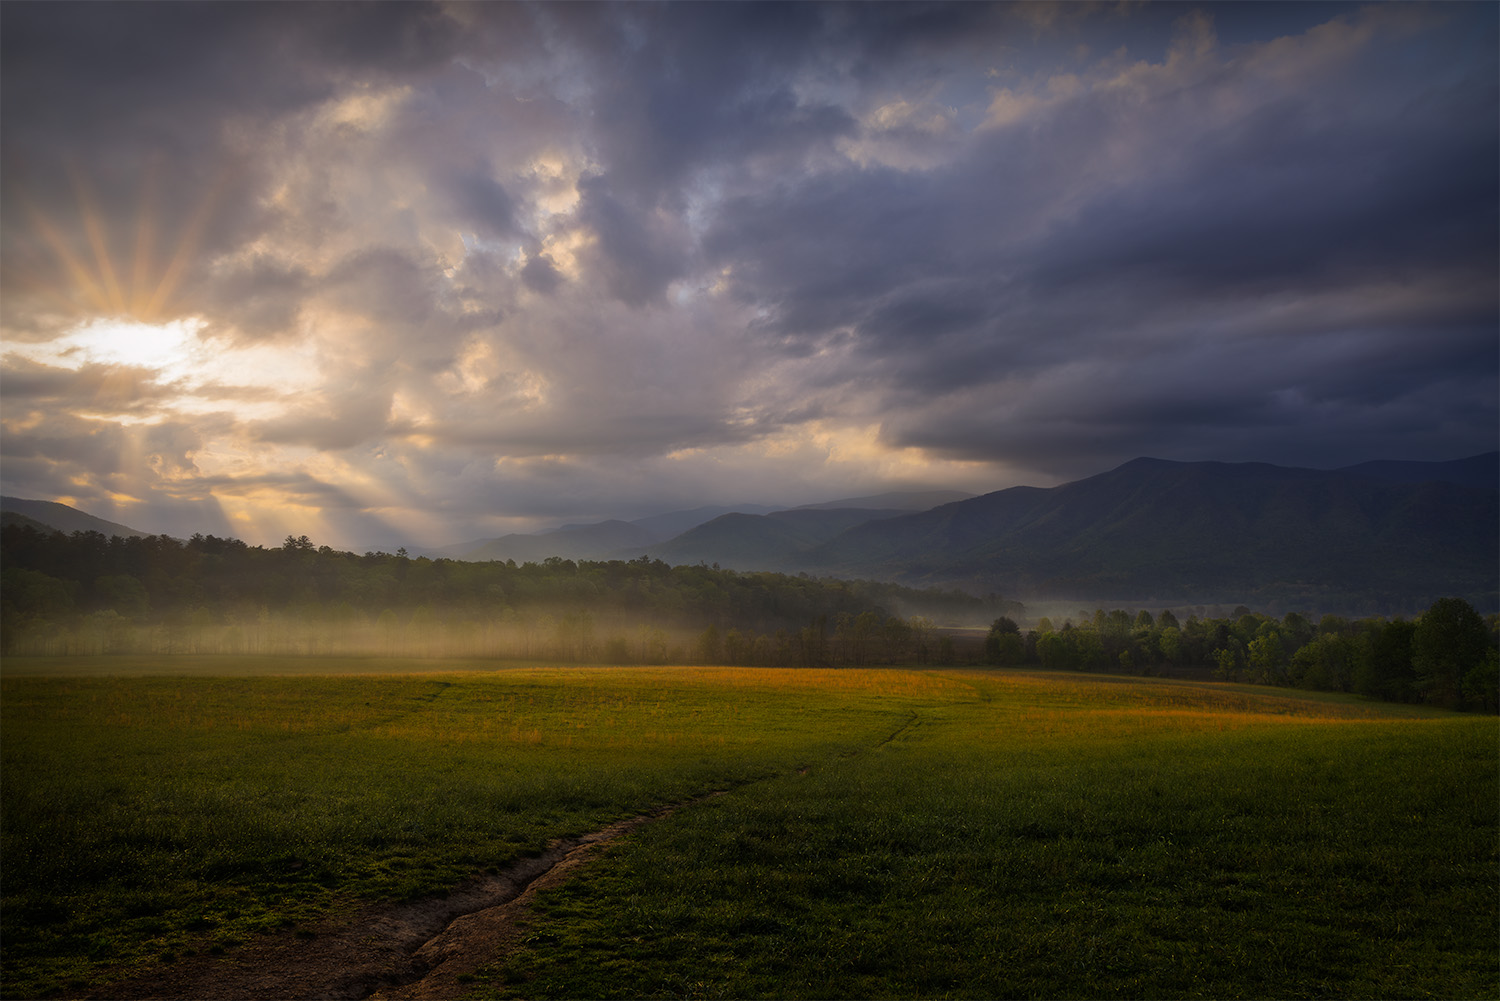
I've stood in front of a scene that stopped me cold — a ridgeline catching the first light, fog sitting low on a lake at dawn — pressed the shutter, looked down, and seen something flat and lifeless that looked nothing like what was in front of me. Every landscape and nature photographer knows that gap between what you saw and what came out. The fix almost never lives in a better camera. It lives in learning to command the one you already own, and that starts with the exposure triangle.
This command begins with a fundamental concept: the exposure triangle. New to landscape photography? Start with my beginner's field guide for the practical basics before diving deeper into the exposure triangle. Mastering exposure means controlling both the amount of light that reaches the sensor and the camera's sensitivity to light, which is influenced by the camera lens, ISO settings, and how these elements work together to determine the final image brightness and quality.
The Foundation of Great Images: The Exposure Triangle
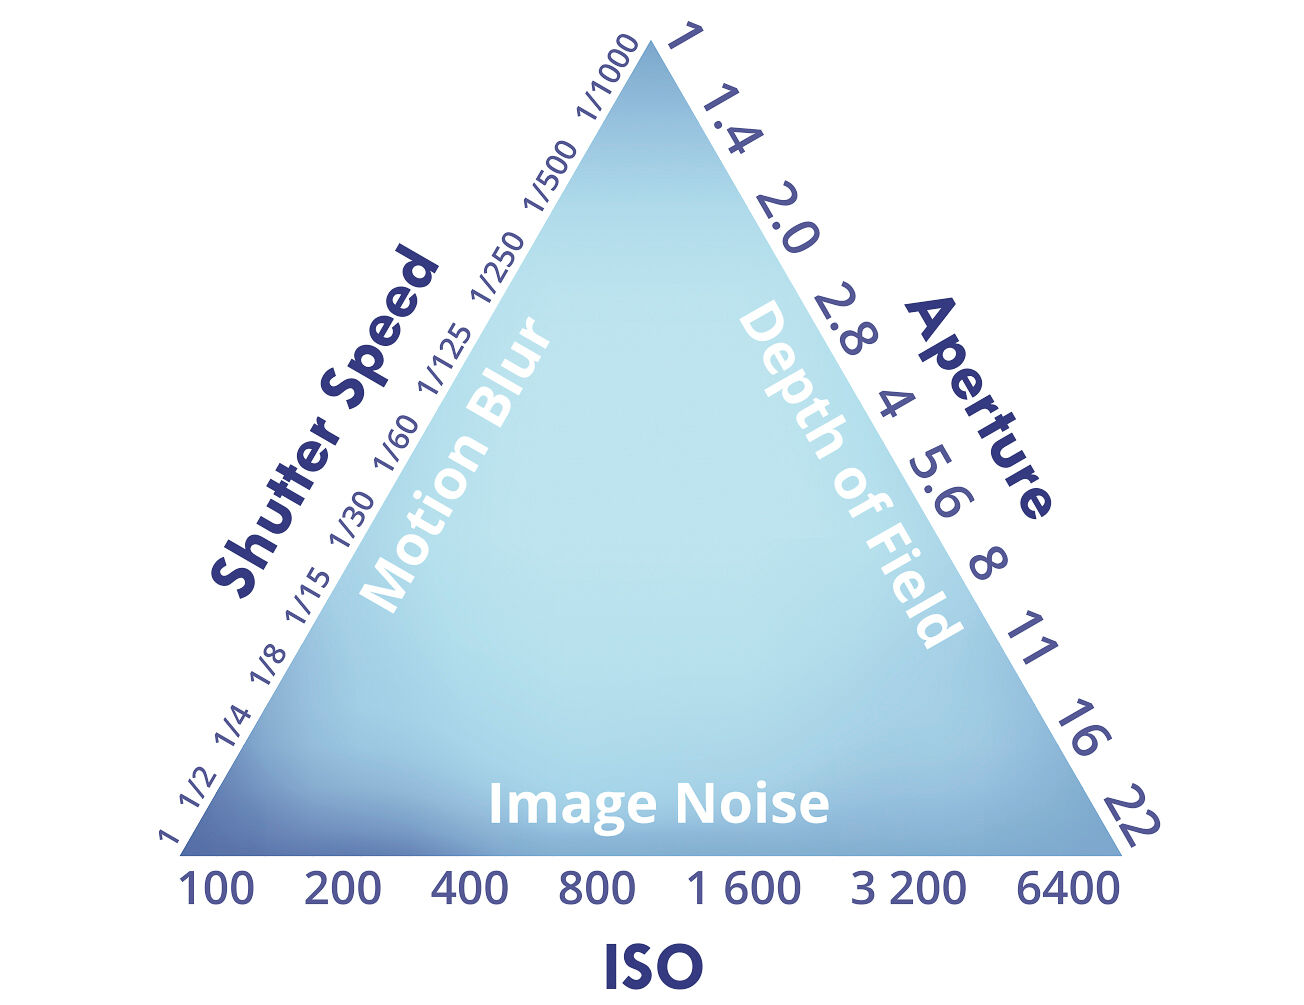
The exposure triangle is the bedrock of photography, a conceptual model representing the relationship between the three settings that control the brightness, or exposure, of an image: aperture, shutter speed, and ISO. These three variables are often visualized as three equal parts, each contributing to a proper exposure. Each setting not only affects the amount of light reaching the digital sensor but also introduces a distinct creative side effect, such as depth of field, motion blur, or digital noise.
Why Mastery is Crucial for Landscape Photographers
For landscape photographers, mastering this interplay is non-negotiable. Unlike other genres where you might react to fleeting moments, landscape photography is often a deliberate, methodical process. It involves interpreting the quality of available light—whether natural light or artificial light—deciding how to render motion in water or clouds, and ensuring sharpness from the nearest wildflower to the most distant peak. Relying on your camera's automatic modes relinquishes this artistic control, letting an algorithm make creative decisions for you. True mastery empowers you to translate the scene before you into a compelling, intentional photograph.
What You'll Learn: Taking Deliberate Control of Exposure
This guide goes past a one-line definition. I'll break down each of the three settings the way I use them in the field for landscape work, show how they pull against each other, and walk through the exact scenarios that trip people up. By the end you'll have a framework for making deliberate exposure choices instead of hoping — the kind that produce well exposed photos that match your artistic vision.
Understanding exposure will help you improve on your landscape photography.

Mastering Your Camera's Settings for Landscape Photography
To make landscape photos that actually hold up, you have to understand your camera's modes and settings. Modern cameras pack in advanced features and automation that can either help you or quietly make creative decisions for you. Using M mode lets you adjust ISO independently from aperture and shutter speed, giving you precise control over exposure within the exposure triangle. Below I walk through the key functions and how each one earns its place in your landscape photography — but before you go deeper on individual settings, get familiar with camera modes explained. Knowing your modes is what lets you make fast calls when the light is changing and you don't have time to think.
Deconstructing the Exposure Triangle: Core Concepts for Landscape Photography
To master the whole, you first have to understand the parts. Getting exposure right is a key step toward good composition — it frees you to balance the technical and the creative instead of fighting your camera. Each corner of the exposure triangle gives you a distinct tool for shaping the final image. The goal is a perfect exposure, achieved by balancing these three settings against each other.
Aperture: Controlling Depth of Field and Sharpness
Aperture refers to the adjustable opening within your lens, much like the pupil of an eye, that controls how much light passes through to the sensor. Aperture size determines the amount of light entering the body and is measured using the f-stop scale, where each full f-stop halves or doubles the light. A lower f-stop number (e.g., f/2.8) corresponds to a wider opening, letting in more light. A wider aperture allows as much light as possible to reach the sensor, which is especially useful in low light conditions, and a wide open aperture also throws the background out of focus for a softly blurred background. A higher f-stop number (e.g., f/16) signifies a smaller aperture, letting in less light.
For landscape photographers, aperture's primary creative impact is on the depth of field (DoF)—the range of distance within the scene that appears acceptably sharp. Aperture refers to that opening, and the settings you choose determine how much of the frame renders as a sharp image.
- Wide Aperture (e.g., f/4): Creates a shallow depth of field, isolating a subject (like a foreground flower) and blurring the background. A wider aperture allows more light passing through the lens.
- Narrow Aperture (e.g., f/11-f/16): Creates a deep depth of field, rendering the entire scene from foreground, through the middle ground, to background in sharp focus. A smaller aperture results in greater depth, keeping more of the scene in focus. This is the hallmark of classic landscape photography and enhances the sense of depth by keeping all compositional layers clear.
Your choice of aperture works hand-in-hand with focal length to determine how much of the scene appears sharp.
Shutter Speed: Freezing or Blurring Motion
Shutter speed dictates the duration for which the digital sensor is exposed to light, measured in seconds or fractions of a second (e.g., 1/1000s, 1s, 30s). For example, a shutter speed of 1/60s allows light for one sixtieth of a second. The camera's shutter is the physical mechanism that opens and closes to control how long the sensor is exposed; the shutter remains open for the duration you set. When the shutter opens, light reaches the sensor for that time. A faster shutter allows less light in, while a longer shutter speed allows more. In manual mode you set this duration yourself rather than letting the camera choose it.
Its creative function is to control the depiction of motion.
- Fast Shutter Speed (e.g., 1/500s or faster): Freezes motion to freeze action, capturing crashing waves with crisp detail or preventing blur from wind-blown foliage.
- Slow Shutter Speed (e.g., 1/2s or slower): Blurs motion, creating an artistic effect. A long exposure time means the shutter remains open for a longer period, allowing more light and creating motion blur. This is the technique used to render waterfalls as silky ribbons, flatten tumultuous seas, or streak clouds across the sky. Using extended exposures almost always necessitates a sturdy tripod to prevent camera shake.
Taking many images with slight variations in exposure time allows you to choose the best motion effect for your scene, helping you achieve the desired look and depth in your composition. Each press of the shutter button records the scene for exactly the duration you've dialed in.
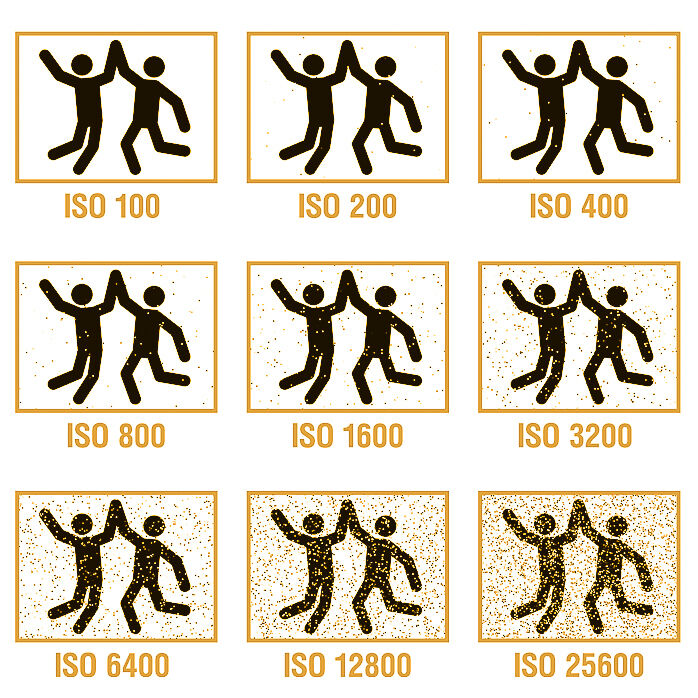
ISO: Managing Light Sensitivity and Image Noise
ISO measures the sensitivity of your sensor to light. ISO is a measure of sensitivity to light, which is crucial for achieving proper exposure in various lighting conditions. A low ISO (e.g., 100 or 200) means the sensor is less sensitive, requiring more light for a proper exposure. A high ISO (e.g., 3200 or 6400) makes the sensor more sensitive, allowing you to shoot in darker conditions.
The trade-off for this increased sensitivity is the introduction of digital noise, which manifests as a grainy or speckled texture that can degrade image quality and obscure fine details. The higher the ISO, the higher the noise level in the final file. For landscape photographers who prize clarity and detail, the guiding principle is to keep the ISO as low as possible (at its base value, typically ISO 100) for the given lighting conditions. This is why ISO is the third corner of the exposure triangle — also called the photographic triangle or photography triangle — and the one to move last.
ISO in digital photography refers to the sensitivity of the sensor to light. Increasing the ISO setting amplifies the sensor's output signal, allowing for shooting in low light conditions without altering the aperture or exposure time. Here's how this process can lead to digital noise:
- Light and Sensor Sensitivity: In a sensor, each pixel collects light photons and converts them into an electrical signal, which is then digitized. The amount of collected light is limited by the exposure (determined by the aperture and exposure duration).
- Signal Amplification: When you increase the ISO setting, you are instructing the body to multiply the electrical signals coming from the sensor. This effectively simulates having a more sensitive sensor, resulting in a brighter image from the same amount of light.
- Inherent Sensor Noise: Sensor readings always include some amount of noise—random variations in the electrical signal that are independent of the light. This noise comes from various sources, including the electronic circuitry and thermal activity in the sensor.
- Amplification of Noise: When the signal is amplified to increase the ISO setting, the noise is also amplified. At low ISO settings, the signal is strong compared to the noise (a high signal-to-noise ratio). As the ISO increases, the signal and noise are amplified equally, leading to a lower signal-to-noise ratio.
- Appearance of Noise: As the noise becomes more pronounced relative to the signal, it becomes visible in the form of graininess or color speckles, especially in uniformly colored regions like shadows or skies. This is what is referred to as digital noise or "grain."
- Trade-off: Photographers must balance exposure settings, including ISO, to maintain image quality. While higher ISO settings allow for photos in darker environments, they do so at the cost of introducing more noise.
Understanding this balance is crucial for photographers aiming to capture images with optimal clarity and detail in varying lighting conditions. Balancing ISO, aperture, and exposure duration ensures your images are correctly exposed.
The Interplay: Balancing the Exposure Triangle for Optimal Landscape Exposure
Understanding each element individually is only the first step. The true power comes from mastering their dynamic, reciprocal relationship — how aperture, shutter speed, and ISO each affect exposure. Changing one setting requires an adjustment to at least one of the others to maintain the same level of exposure. The goal is to achieve a properly exposed image, avoiding both an overexposed image (too much light, which clips highlight detail) and an underexposed image (too little light, which loses shadow detail).
The Concept of "Exposure Stops": How Changes Ripple Through the Triangle
Each setting is measured in "stops." A stop refers to a doubling or halving of the amount of light reaching the sensor. The stop number on your f-stop scale works inversely — a higher number means a smaller opening. For example, changing your exposure time from 1/125s to 1/250s is a one-stop decrease in light. To compensate and maintain the same exposure, you could open your aperture by one stop (e.g., from f/11 to f/8) or increase your ISO by one stop (e.g., from 100 to 200). This principle of reciprocity is the mechanical core of manual exposure control.
Achieving Correct Exposure: Understanding the Relationship Between Aperture, Shutter, and ISO
Imagine your creative goal is a classic, deep-focus landscape. You set your aperture to f/11. Now, you must balance ISO, aperture, and shutter speed to achieve correct exposure. On a bright sunny day, a low ISO of 100 might require an exposure time of 1/125s. As the sun sets, the same f/11 and ISO 100 might require a much longer exposure of 2 seconds. The creative choice (deep DoF) dictates the first setting, and the ambient light dictates how you balance the other two into a proper exposure.
Reading the Light: Mastering Your Metering Modes
Your built-in light meter is your guide to achieving a balanced exposure. It analyzes the scene and suggests settings. Understanding its modes is crucial:
- Evaluative/Matrix Metering: Reads light from the entire frame, providing a good general-purpose starting point for most landscapes.
- Center-Weighted Metering: Prioritizes the light in the center of the frame.
- Spot Metering: Reads light from a very small point, useful for precision metering on a specific tone, like a grey rock, to ensure accurate exposure in tricky high-contrast scenes.
Fine-Tuning Exposure: Using Exposure Compensation (+/- EV)
When shooting in priority modes (like Aperture Priority), you can use the Exposure Compensation dial to tell the system you want the image to be brighter or darker than its meter suggests. Dialing in +1 EV will make the image one stop brighter, while -1 EV will make it one stop darker. This is essential for correcting for scenes that can fool the meter, such as bright snow or dark forests.
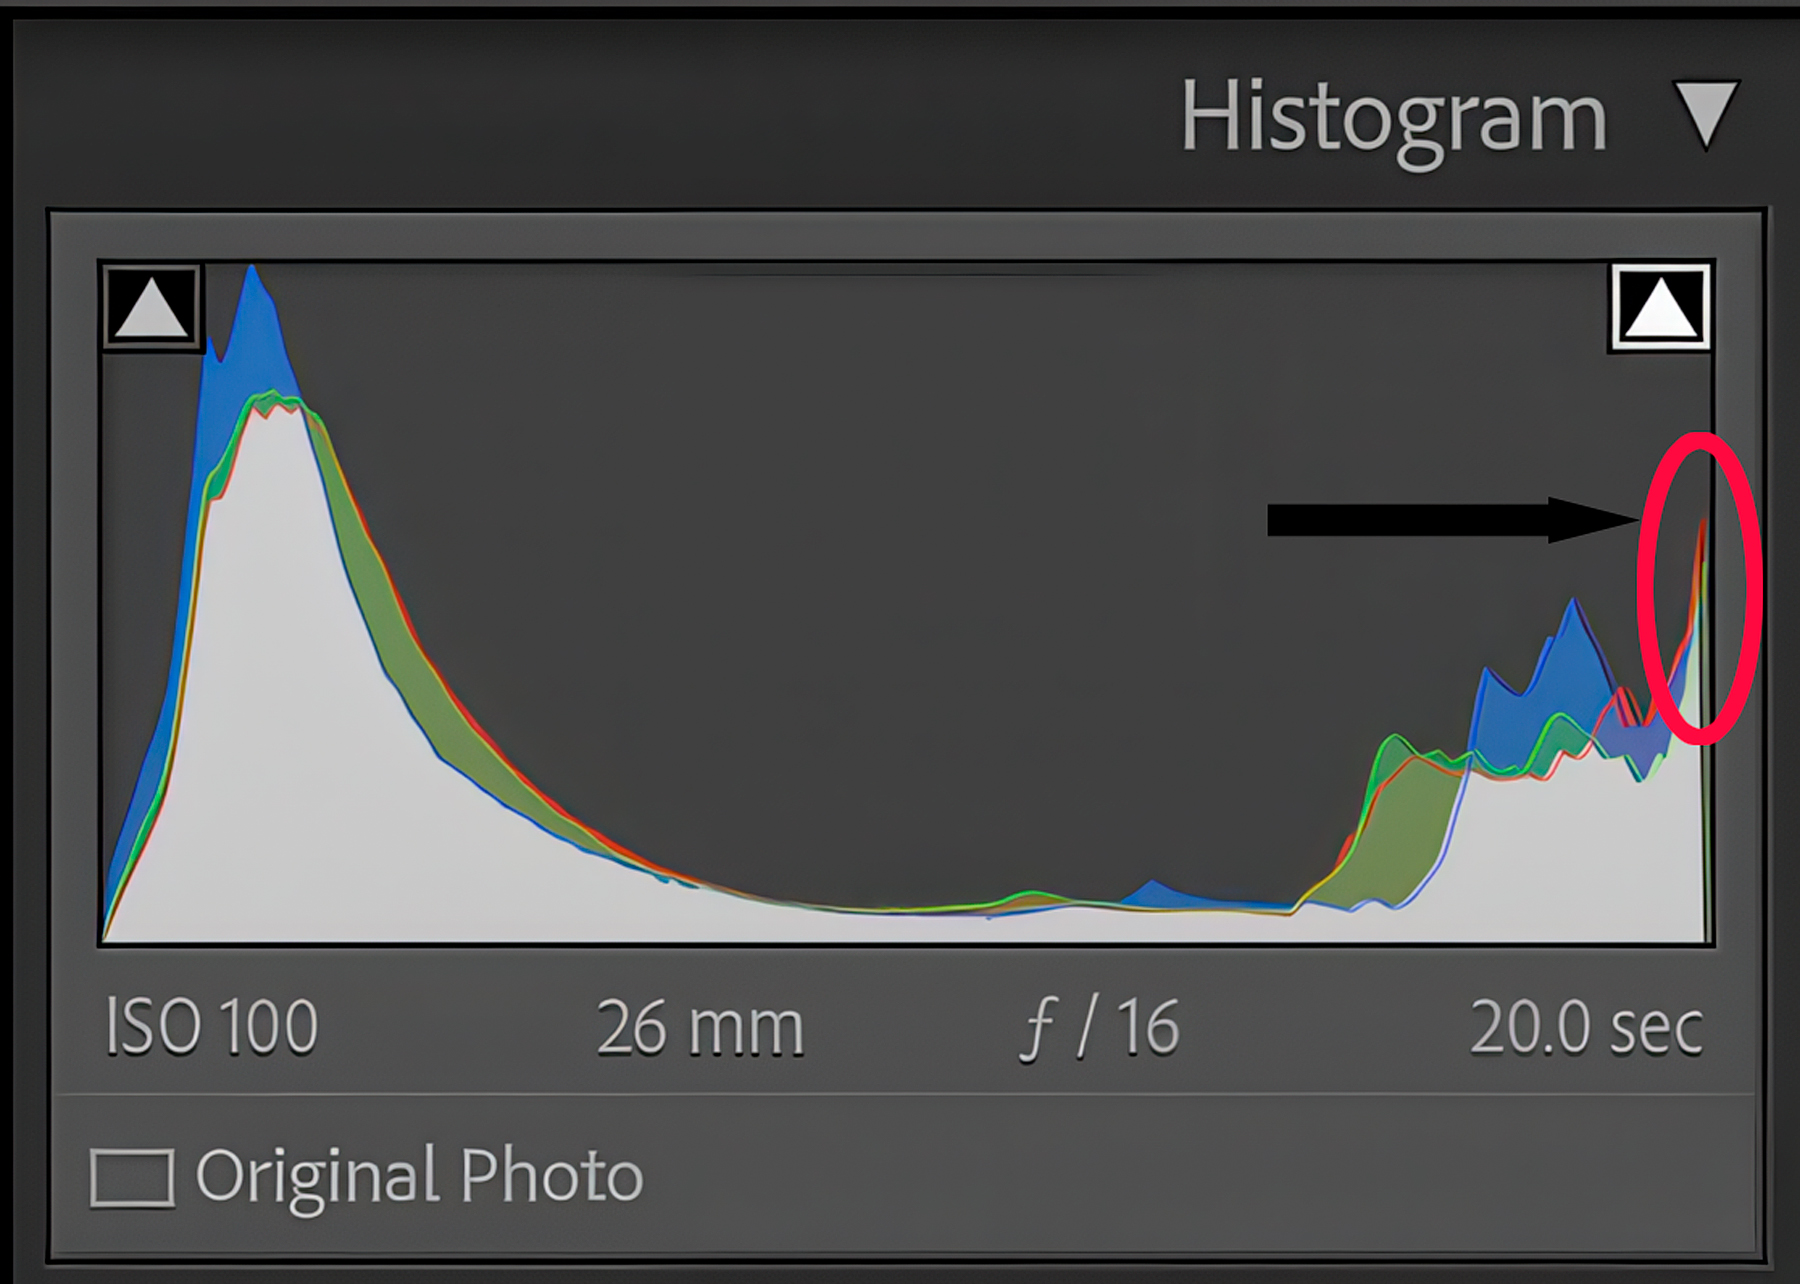
Visualizing Exposure: The Histogram as Your Predictive Tool
The histogram is your most accurate tool for judging exposure. It is a graph that displays the tonal range of your image, from pure black on the left to pure white on the right. A well-exposed landscape photograph typically has a graph with tones distributed across the range without significant "clipping" (spikes pushed against either edge). A spike on the far right indicates blown-out highlights (lost detail in bright areas), while a spike on the far left indicates crushed blacks (lost detail in shadows). Learning to read the histogram allows you to assess exposure accurately, independent of your screen's brightness.
ETTR, or Exposing to the Right, is a technique in digital photography aimed at maximizing the amount of information captured by the sensor. This method involves slightly overexposing an image to ensure that more details, especially in the shadows, are recorded. Here's why ETTR can be beneficial for retaining information without clipping shadows or highlights.
By Exposing To The Right (ETTR) you retain all information by pushing your histogram all the way to the right before it touches the far right side.
Understanding ETTR (Expose to the Right) in Photography
- Sensor Efficiency: Digital sensors are typically more efficient at capturing light in the highlights than in the shadows. By exposing to the right (or overexposing just enough so the histogram is pushed towards the right side but not beyond), you harness the full dynamic range of the sensor. This ensures more light is used efficiently, capturing more detail, particularly in darker areas that are often noisier and less detailed.
- Noise Reduction: Shadows tend to contain more digital noise because there's less light and information available. By using ETTR and pushing the exposure towards the highlights, shadows receive more light, effectively reducing noise when these areas are pulled back in post-processing.
- Post-Production Flexibility: When you expose to the right, you ensure that there's more data captured across the entire tonal range. This means in post-processing, you have more flexibility to adjust shadows, midtones, and highlights without degrading image quality. This results in better adjustments and fine-tuning capabilities, such as enhancing contrast or reducing noise while preserving details.
- Highlight Safety: Proper ETTR should still prevent clipping in the highlights. It's crucial to monitor the histogram while shooting, making sure it doesn't spike against the right edge where data would be lost completely. By avoiding this kind of highlight clipping, ETTR allows you to retain detail in the brightest parts of the image.
- Dynamic Range Optimization: Many cameras have a broader dynamic range when images are slightly overexposed. ETTR effectively utilizes this range to capture more transitional details between highlights and shadows, preserving subtle textures and gradations.
- Data Compression Advantage: Most digital cameras save images in RAW format, which stores more information compared to standard formats like JPEG. ETTR takes advantage of the additional data storage capacity in RAW files, ensuring that when you recover shadow details in post, you do not end up with noticeable compression artifacts or a significant drop in quality.
To effectively use ETTR, photographers must regularly check their histogram to ensure that no significant data is clipped. A correct exposure in this context is about capturing as much data as possible without permanently losing details in the highlights and minimizing noise in the shadows.
Camera Modes for Intentional Landscape Exposure
Your shooting modes determine the level of control you have over the exposure triangle. Moving beyond Auto is the first step toward intentional photography.
Aperture Priority Mode (Av/A): Your Go-To for Depth of Field Control
In Aperture Priority mode, you set the aperture and ISO, and the body automatically selects the appropriate exposure time to achieve what it deems a correct exposure. Since depth of field is often the primary creative decision in landscape photography, this mode is incredibly efficient. It allows you to focus on composition and DoF while letting the system handle the timing. It is the preferred mode for a vast number of professional landscape photographers. Settings alone don't make the photograph — for the broader habits that move the needle, see how to improve your landscape photography with composition, light, and field technique.
Shutter Priority Mode (Tv/S): For Specific Motion Effects
Shutter Priority is the inverse of Aperture Priority. You set the exposure duration and ISO, and the system chooses the aperture. This mode is less common for general landscape work but becomes invaluable when the depiction of motion is your absolute priority. For instance, if you need a fast shutter speed of 1/1000s to freeze a wave or exactly 2 seconds to blur a waterfall, Shutter Priority ensures you get that precise duration.
Full Manual Control (M): The Path to True Creative Mastery
In M mode, you control all three settings: aperture, shutter, and ISO. The light meter gives you a guide, but the final call is yours. This is where you get complete creative control, and it's what I shoot in most of the time — it's essential for consistency, especially on panoramas or in scenes where the light is shifting fast and the priority modes would otherwise wander frame to frame. Learning to work in full manual is the point you're building toward.
Mastering Landscape Challenges with the Exposure Triangle: Scenario-Based Strategies
Theory becomes practice in the field. Mastering exposure helps direct the viewer's attention to the most important parts of the landscape. Here's how to apply your knowledge to common landscape scenarios.
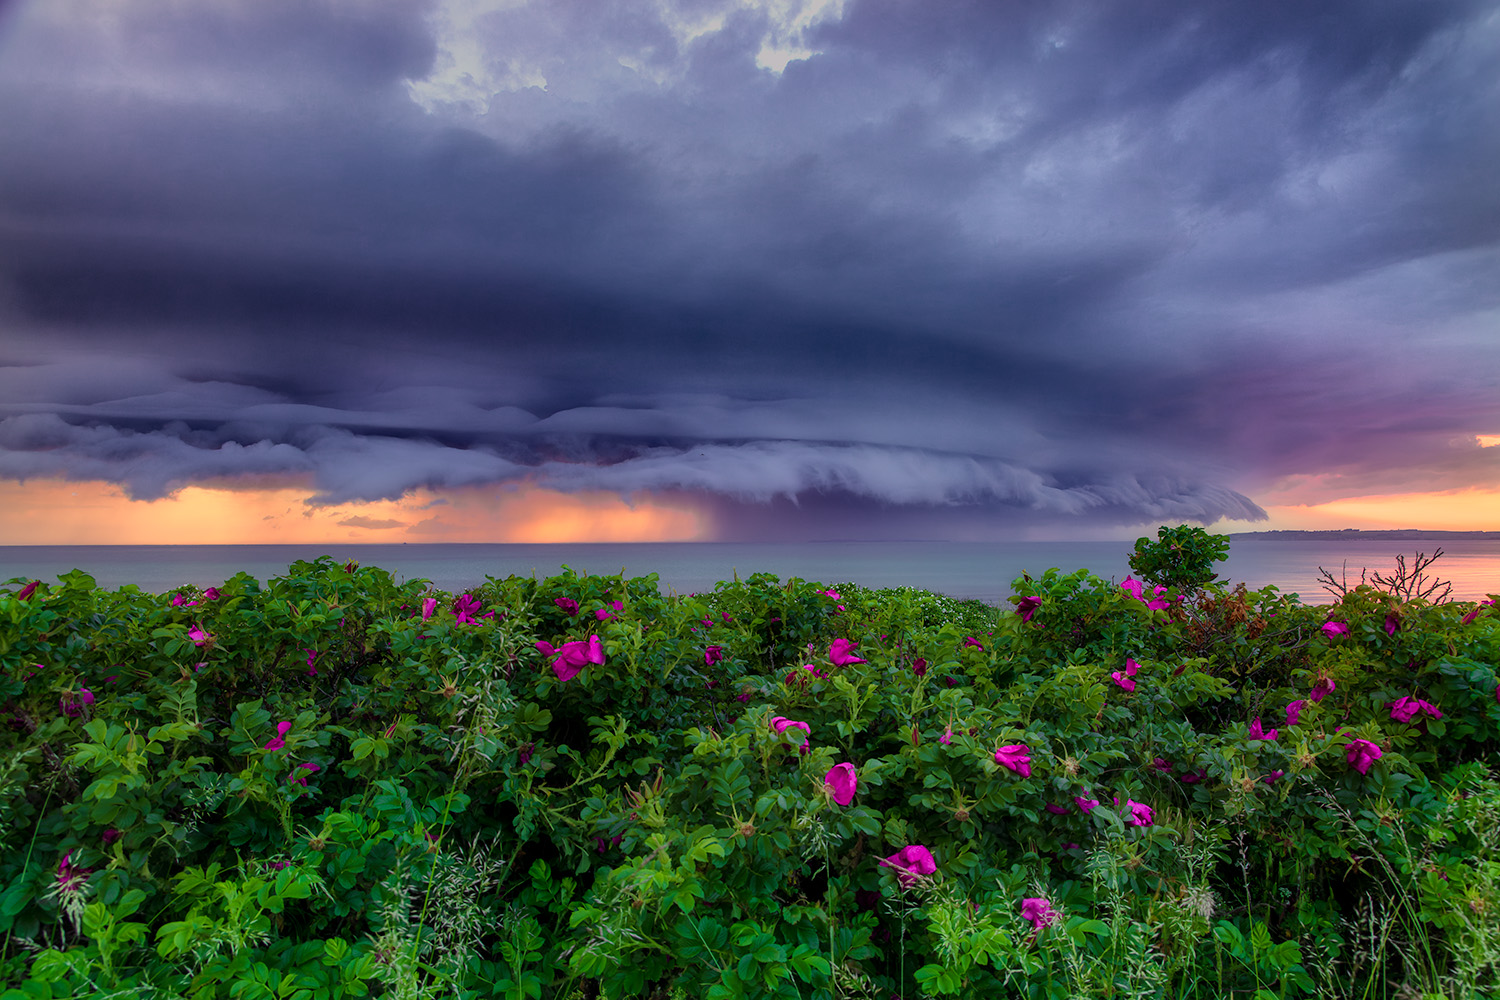
High-Contrast Scenes: Balancing Bright Skies and Dark Foreground
The challenge is to retain detail in both the bright clouds and the shadowed mountains.
- Strategy: Meter for the highlights (point at a bright part of the sky, but not the sun) to ensure they aren't blown out. Your foreground may appear dark (an underexposed image in the shadows), but it is often easier to recover shadow detail in post-processing than to recover blown highlights. In high dynamic range scenes, you may need to blend exposures to avoid underexposure in shadows or an overexposed image in the highlights.
- Settings: Use M mode, a narrow aperture (f/11), and base ISO (100). Adjust exposure time until the histogram shows the highlights are just shy of clipping on the right edge.
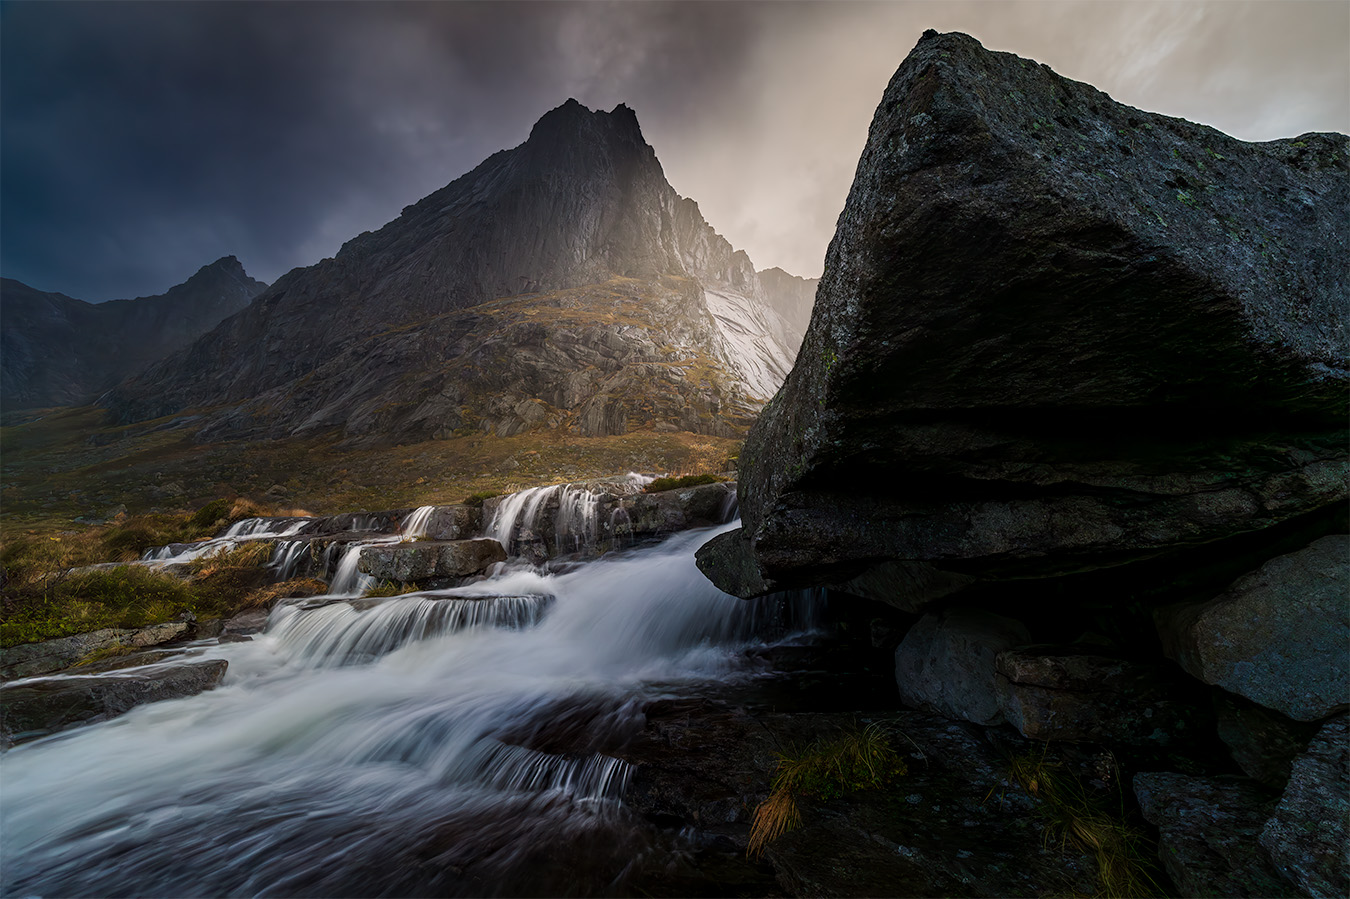
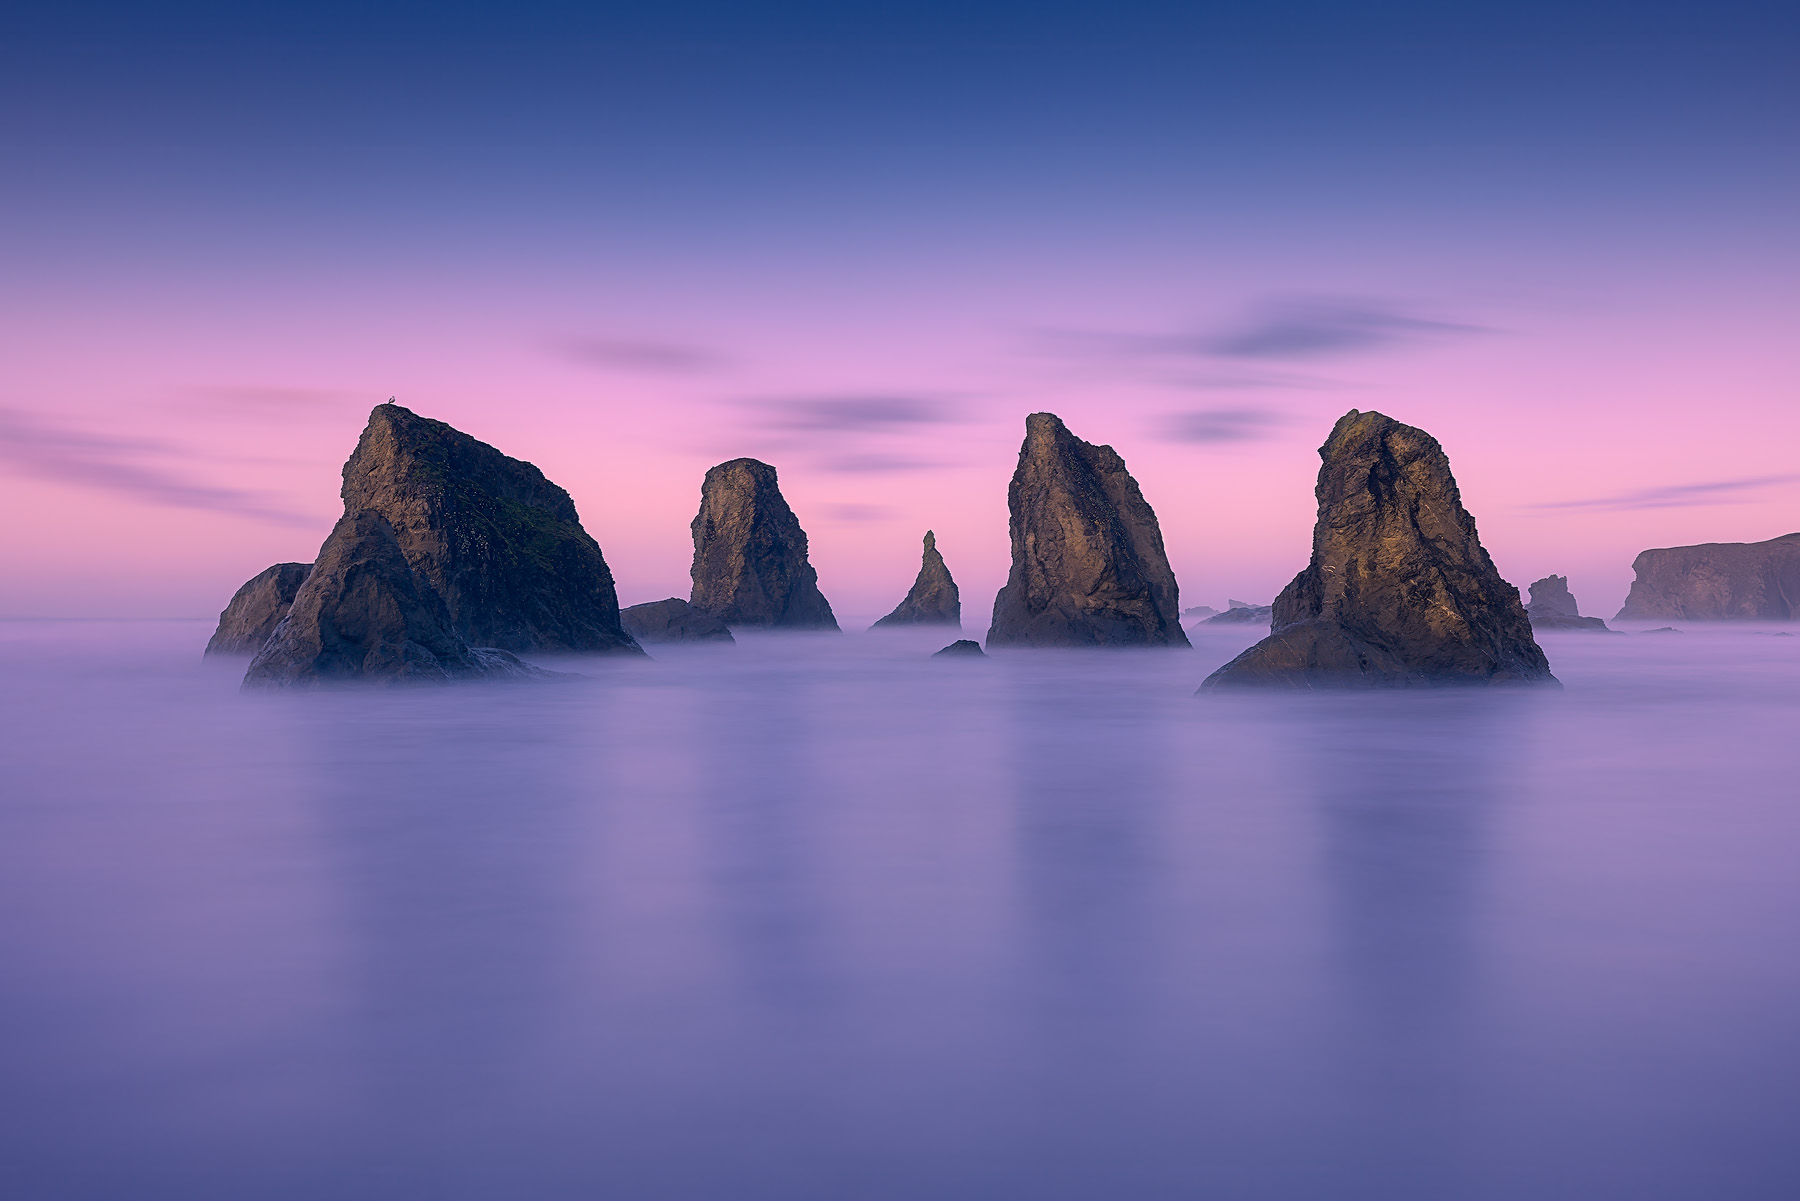
Water in Motion: Capturing Silky Smooth Falls and Dynamic Waves
Your exposure duration is the key creative control here.
- Strategy: Mount your gear on a tripod. To create a smooth, ethereal look, you need a long exposure.
- Settings: Use Shutter Priority or full manual. Start with an exposure time of 1-2 seconds. Set your ISO to 100. Your aperture will likely need to be narrow (e.g., f/16 or f/22) to prevent overexposure due to the long duration.
Good examples of silky water effects in landscape photography can be found in many professional portfolios—study these images to see how motion blur in the water helps distinguish the main subject.
Low Light and Night Skies: Unveiling the Northern Lights and Stars
This scenario pushes your gear to its limits, demanding a balance between gathering enough light and managing noise. In night photography, you often rely on natural light from the stars or moon, but sometimes artificial light sources can be used to illuminate the scene.
- Strategy: Use a tripod. To capture sharp stars, you need the widest aperture your lens offers and an exposure time that is fast enough to prevent star trails.
- Settings: Full manual is essential. Set your aperture as wide as possible (e.g., f/2.8). Set your ISO high, starting around 3200. For a complete guide to aurora settings and forecasting, see how to photograph the northern lights. Use the "500 Rule" (500 divided by your focal length) as a starting point to avoid star trails (e.g., for a 20mm lens, 500/20 = 25 seconds).

Golden Hour and Twilight: Harnessing Dynamic Light
The light is soft and changes quickly, requiring nimble adjustments.
- Strategy: A tripod is highly recommended as light levels drop. The priority is capturing light with rich color and soft shadows.
- Settings: Aperture Priority is excellent here. Set your aperture for the desired DoF (e.g., f/11) and your ISO to 100. Let the system adjust exposure time as the light fades. Keep a close eye on your histogram and use exposure compensation if needed to brighten shadows.
My rule of thumb for landscape photography is simple: always keep your ISO as low as possible. For a complete guide to when low ISO is essential and when raising it is the right call, see my guide to ISO and image quality in landscape photography. Since I'm almost always using a tripod, I can use a longer exposure to gather more light instead of raising my ISO. I only increase my ISO when I have no other choice, such as when shooting handheld in low light conditions or for astrophotography, where I need to capture faint starlight.

Extending the Exposure Triangle: Essential Filters for Landscape Photographers
Sometimes, ambient light and lighting conditions make achieving your artistic vision impossible with the exposure triangle alone. This is where filters become essential extensions of your toolkit.
Neutral Density (ND) Filters: Prolonging Exposure in Bright Conditions
An ND filter is like sunglasses for your lens, reducing the amount of light entering without affecting color. This allows you to use much longer exposures than would otherwise be possible in bright daylight. A 10-stop ND filter, for example, is essential for creating long-exposure effects with water or clouds during the day.
I remember shooting a sunset on the coast. The light was fading fast, and waves were crashing against the sea stacks. My creative goal was to blur the water's motion while keeping the rocks sharp. First, I set my ISO to 100 for maximum quality. Next, I set my aperture to f/16 to ensure the whole scene was in focus. The suggested exposure time was 1/4s, but that wasn't long enough for the silky effect I wanted. By adding a filter to reduce the light, I was able to extend to a 2-second exposure, transforming the chaotic waves into a soft, ethereal mist. This is the exposure triangle in action!
Using a 10ND CPL filter to control the amount of exposure but to achieve the overall look I wanted.
Graduated Neutral Density (GND) Filters: Balancing Scene Luminosity
A GND filter is dark on top and clear on the bottom, designed to balance the exposure between a bright sky and a darker foreground. By positioning the dark part over the sky, it reduces its brightness, allowing for a single exposure that captures detail in both areas, reducing the need for extensive post-processing.
Polarizing Filters: Enhancing Color, Contrast, and Clarity
A circular polarizer is arguably the most critical filter for a landscape photographer. For a deeper look at how shutter speed controls motion in your landscape images — from freezing waves to creating silky waterfalls — see our guide to shutter speed in landscape photography.
It works by cutting down on polarized light, which reduces glare and reflections on surfaces like water and wet leaves. This has the effect of deepening blue skies, increasing color saturation, and enhancing overall clarity. It typically reduces exposure by 1-2 stops, which must be compensated for within the exposure triangle.
Polarizing filter helps make colors pop and unwanted waxy sheen on vegetation and water disappear.
Beyond the Camera: Post-Processing and the Exposure Triangle Workflow
Your control over exposure doesn't end when you press the shutter button. Your decisions in the field directly impact your flexibility later.
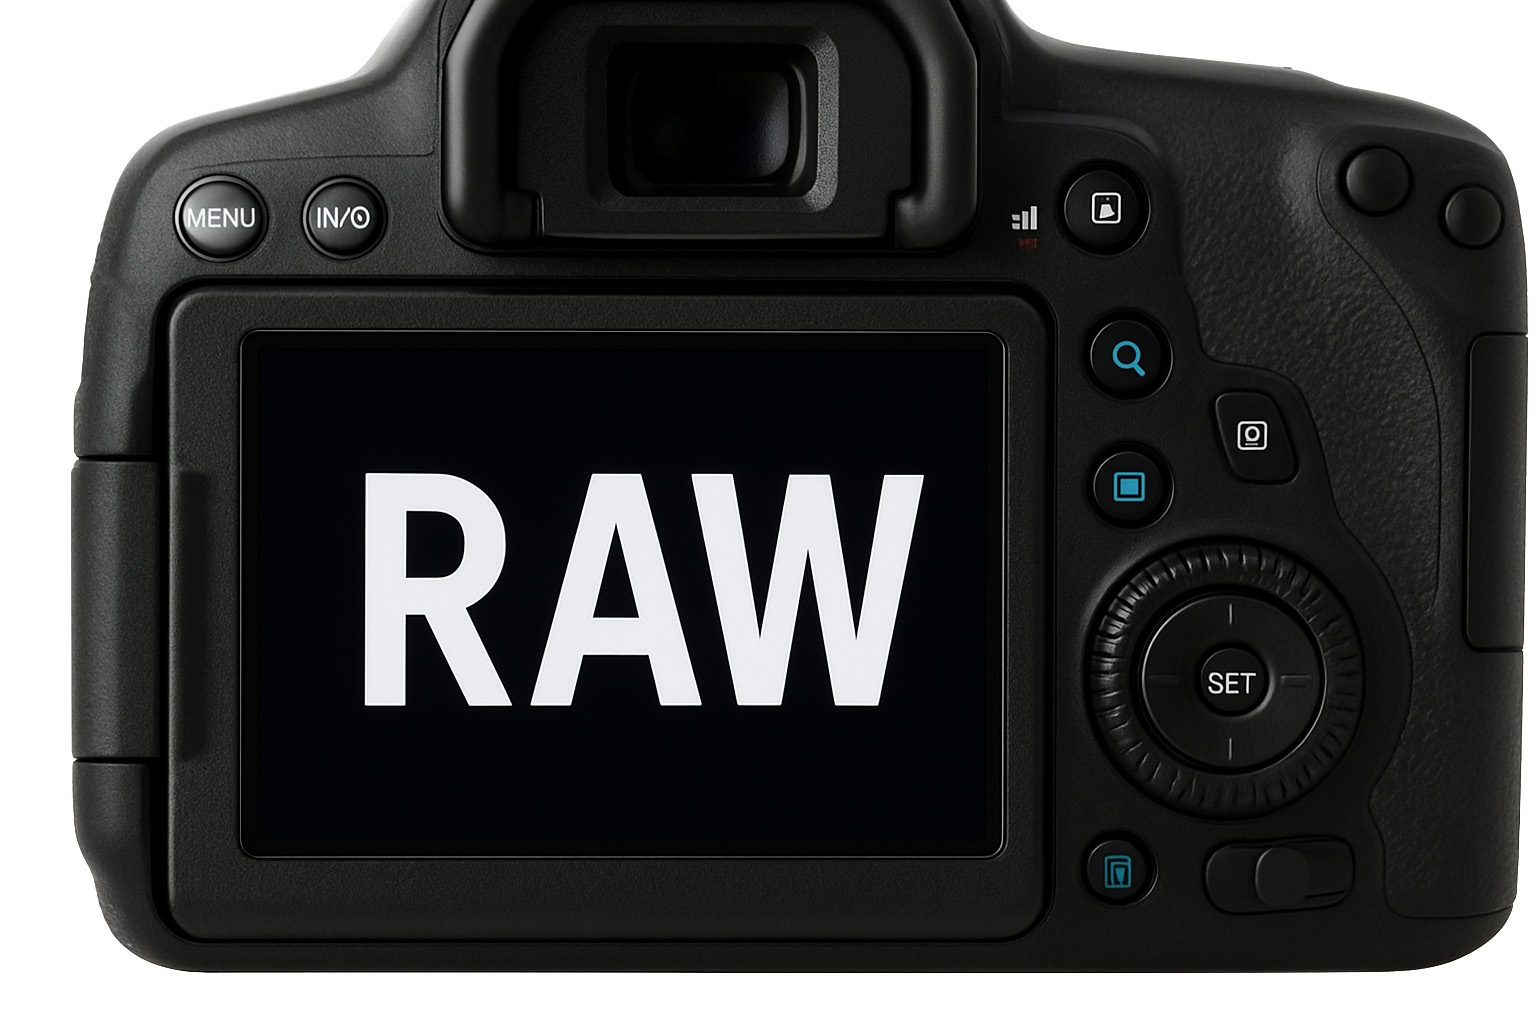
Shooting RAW for Maximum Flexibility and Tonal Range
Shooting in RAW format is crucial. Unlike a JPEG, which is a compressed, processed image, a RAW file contains all the unprocessed data captured by the sensor. This provides significantly more latitude for adjusting exposure, recovering clipped highlights and shadows, and fine-tuning white balance in software like Adobe Lightroom or Capture One. Mastering the exposure triangle in-camera gives you the best possible RAW file to work with.
Frequently Asked Questions About the Exposure Triangle
What is the exposure triangle in photography?
The exposure triangle refers to the relationship between aperture, shutter speed, and ISO — the three settings that control how much light reaches your sensor and how a properly exposed image is achieved. Adjusting one element requires compensating with another to maintain correct exposure.
What is the best f-stop for landscape photography?
Most landscape photographers use an f-stop number between f/8 and f/11 for optimal sharpness and depth of field. A narrower aperture like f/16 provides greater depth but may introduce diffraction softness. The best aperture size depends on whether you need front-to-back sharpness or want to isolate a subject with shallow depth.
How long should I keep my shutter open for long exposures?
For silky water effects, start with 1-2 seconds. For smooth ocean or cloud streaks, try 15-30 seconds with an ND filter. The shutter remains open for the duration you set, so use a tripod to prevent blur. Experiment with different durations — even small changes produce noticeably different motion blur effects.
What ISO should I use for landscape photography?
Keep ISO as low as possible — typically ISO 100. A low ISO produces the cleanest files with minimal noise. Only raise ISO when you cannot achieve a correct exposure through aperture and exposure time alone, such as when capturing light in very dim conditions or shooting the northern lights.
How do I achieve perfect exposure in difficult lighting?
Use your histogram to verify exposure. A stop refers to a doubling or halving of light — adjust one element of the exposure triangle at a time while compensating with another to maintain a well exposed photo. In high-contrast scenes, bracket multiple exposures and blend them in post-processing for the best results.
Conclusion
Mastering the exposure triangle isn't really about memorizing settings. It's about learning the language of light and motion — the thing that moves you from taking pictures to making them. Once you understand how aperture shapes depth, how shutter dictates motion, and how ISO manages sensitivity, the camera stops being in your way and the decisions become yours.
Your journey begins now. Move your dial to Aperture Priority or M mode. Go to a local park or scenic viewpoint and experiment. Or join one of my photography workshops for hands-on practice with these concepts in the field.
Bracket your shots, consciously changing one setting at a time to observe its effect. Study your histogram after every shot. With dedicated practice, the interplay of aperture, shutter, and ISO will become second nature, empowering you to finally create the properly exposed landscape images you've always envisioned. Mastering exposure also enables you to guide the viewer's eye through your landscape images, enhancing their impact.
