Landscape Photography Post Processing: What Actually Happens to Image Data When You Move a Slider
Landscape photography post processing is the practice of editing your RAW files—adjusting exposure, contrast, color, and tone—to reveal the full dynamic range your camera captured. Here's the core of what's actually happening: when you move a slider in your editing software, nothing is added to your photo. The software remaps the numerical values that already make up your image—brightening or darkening pixels and stretching that data into new positions. This guide explains what actually happens to your image data during landscape photography post processing, so you can edit landscape photos with intent instead of guesswork. It's written for landscape photographers who want more control over their results.
When you move a slider—Exposure, Contrast, Highlights, Clarity—it feels immediate and visual. Underneath that simple motion, your software is running a series of mathematical transformations on your image data. Knowing what those transformations actually do helps you edit more intentionally, avoid degrading the file, and get better results with less trial and error.
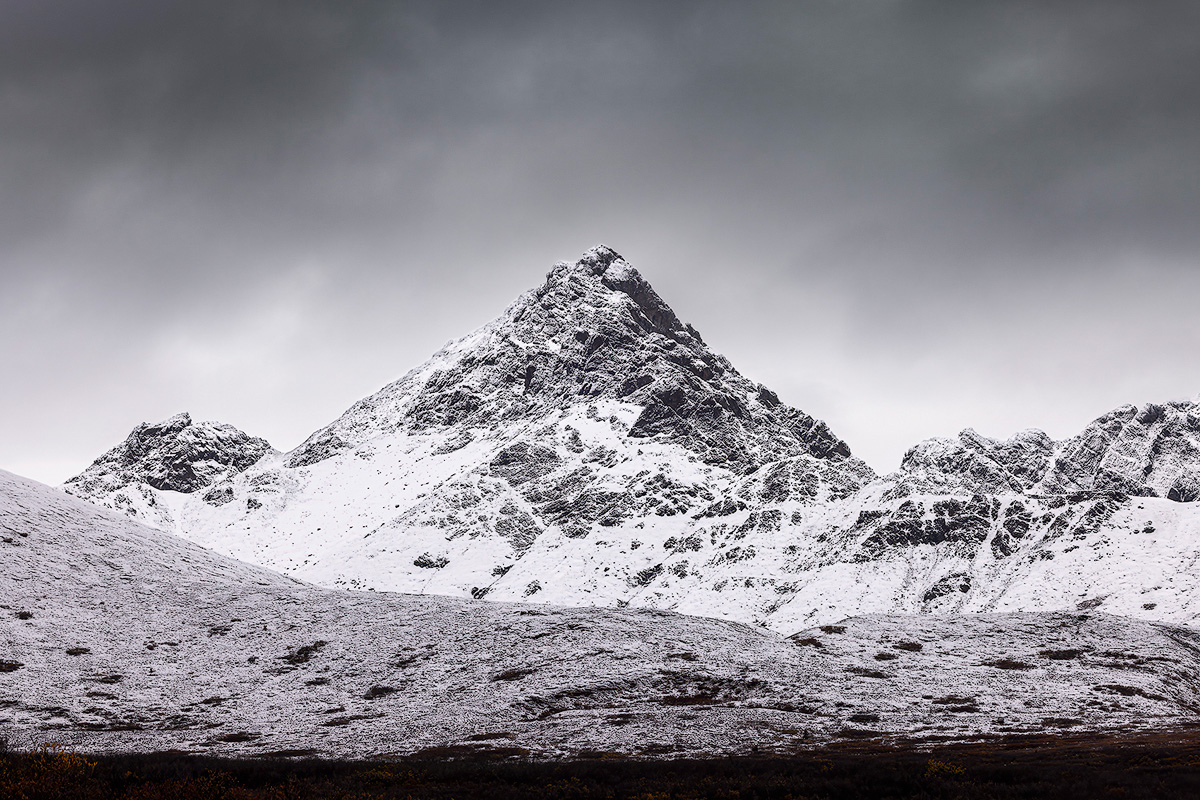
These are the basic adjustments, and they're the foundation of landscape photography post processing. Get them right and the rest of your workflow follows. Whether you're working a fiery Alaskan sunset or pulling detail from the shadow side of a ridge, knowing what's happening under your Lightroom sliders changes how you approach every edit.
Introduction to Post-Processing
Post-processing is where a landscape photograph gets finished. The camera records the scene; the edit is where you decide what that file becomes. I've stood in front of a lot of light over more than twenty years shooting Alaska, and the photos that hold up are the ones where I understood the file I was working with.
It starts with the RAW image file—the unprocessed data your camera recorded. That file holds everything: the gradations in storm clouds, the color shift as light moves across a granite face, the full dynamic range that separates a snapshot from a print worth hanging. The more you understand what's in that file, the better your editing decisions get.
Most cameras default to auto white balance. It works in a lot of situations, but difficult light fools it, so manual white balance adjustment in post is often necessary to correct color casts and get natural-looking results.
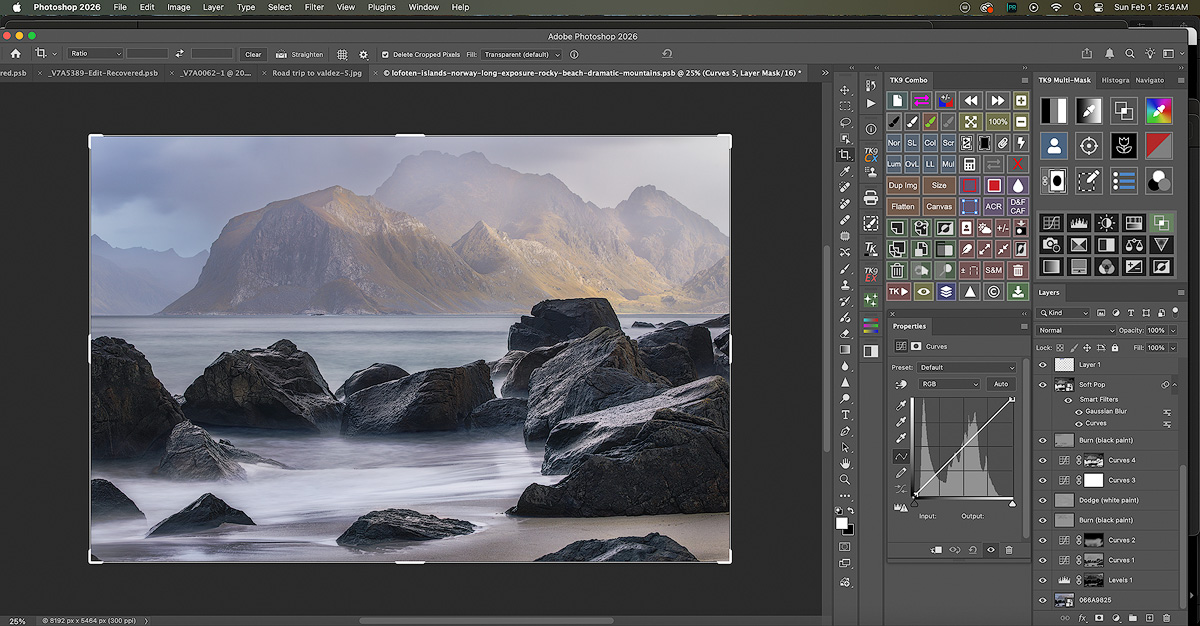
A few tools do the heavy lifting for landscape work. Luminosity masks isolate highlights from shadows with real precision—you can lift detail out of a dark forest floor without wrecking an overcast sky. Layer masks and adjustment layers let you apply edits to specific parts of the frame and keep everything reversible. Having those tools in one workspace streamlines your post-processing workflow.
Master them and you can show what your eye saw but your camera only approximated. Post-processing only reveals what you captured well in the field, so start with solid field technique and build images that earn the edit.
Whether you're starting out or refining a workflow you've run for years, understanding these fundamentals changes how you edit landscape photos. You stop guessing and start making decisions.
If you're still building your foundation, my beginner's guide to landscape photography covers the camera settings and composition fundamentals that feed directly into your editing workflow.
Your Photo Is Just Numbers
Before we get to the sliders, you need to know what your landscape photo actually is at the data level. It's a grid of pixels, and every pixel holds numerical values for brightness and color. In a RAW file, those values come straight off the sensor with minimal processing—all the dynamic range from your shoot, preserved. In a file saved to the JPEG format, those values have already been altered, compressed, and thrown away before you open it. JPEGs have limited post-processing flexibility, especially for white balance and color profiles, compared to RAW files. Your RAW file also stores EXIF data—the settings your camera recorded—alongside the pixel values.
Understanding how image data is structured, and why RAW files are better for post-processing, leads to better editing decisions and higher-quality results.
This is why shooting RAW matters for landscape and nature photography. When you drag the exposure slider, you're not adding light. You're telling the software to remap pixel values—to reinterpret numbers that already exist. The more numbers you have to work with, the more room you have to recover shadow detail or pull back blown highlights without visible damage.
Global Adjustments: Remapping the Entire Image
Sliders like Exposure, Contrast, Whites, and Blacks are global adjustments in Lightroom and other RAW editors. They touch every pixel in the frame, just in different ways.
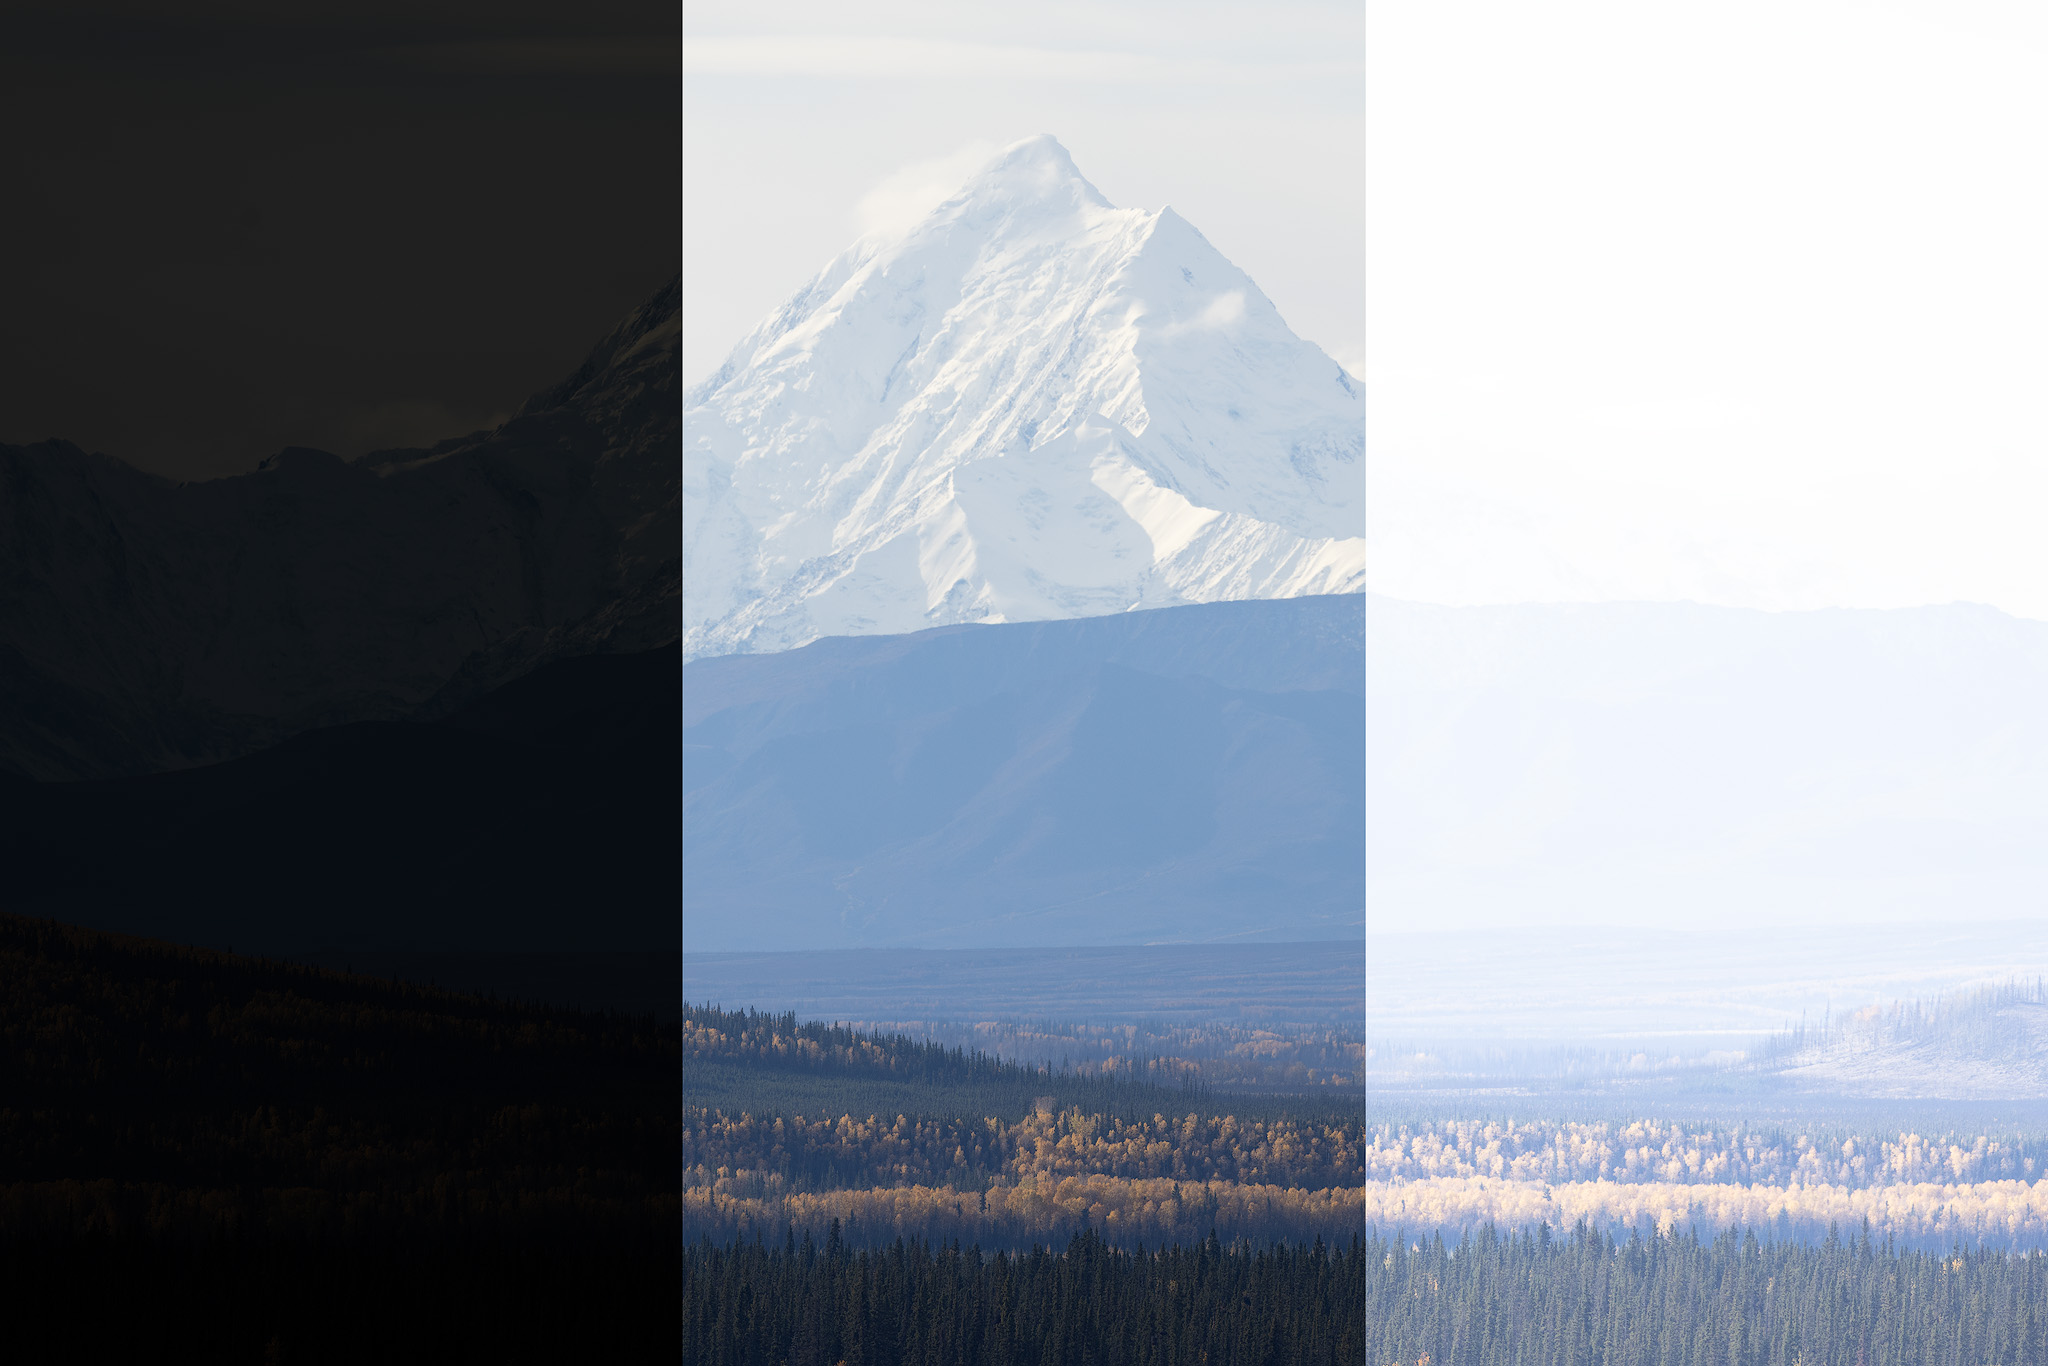
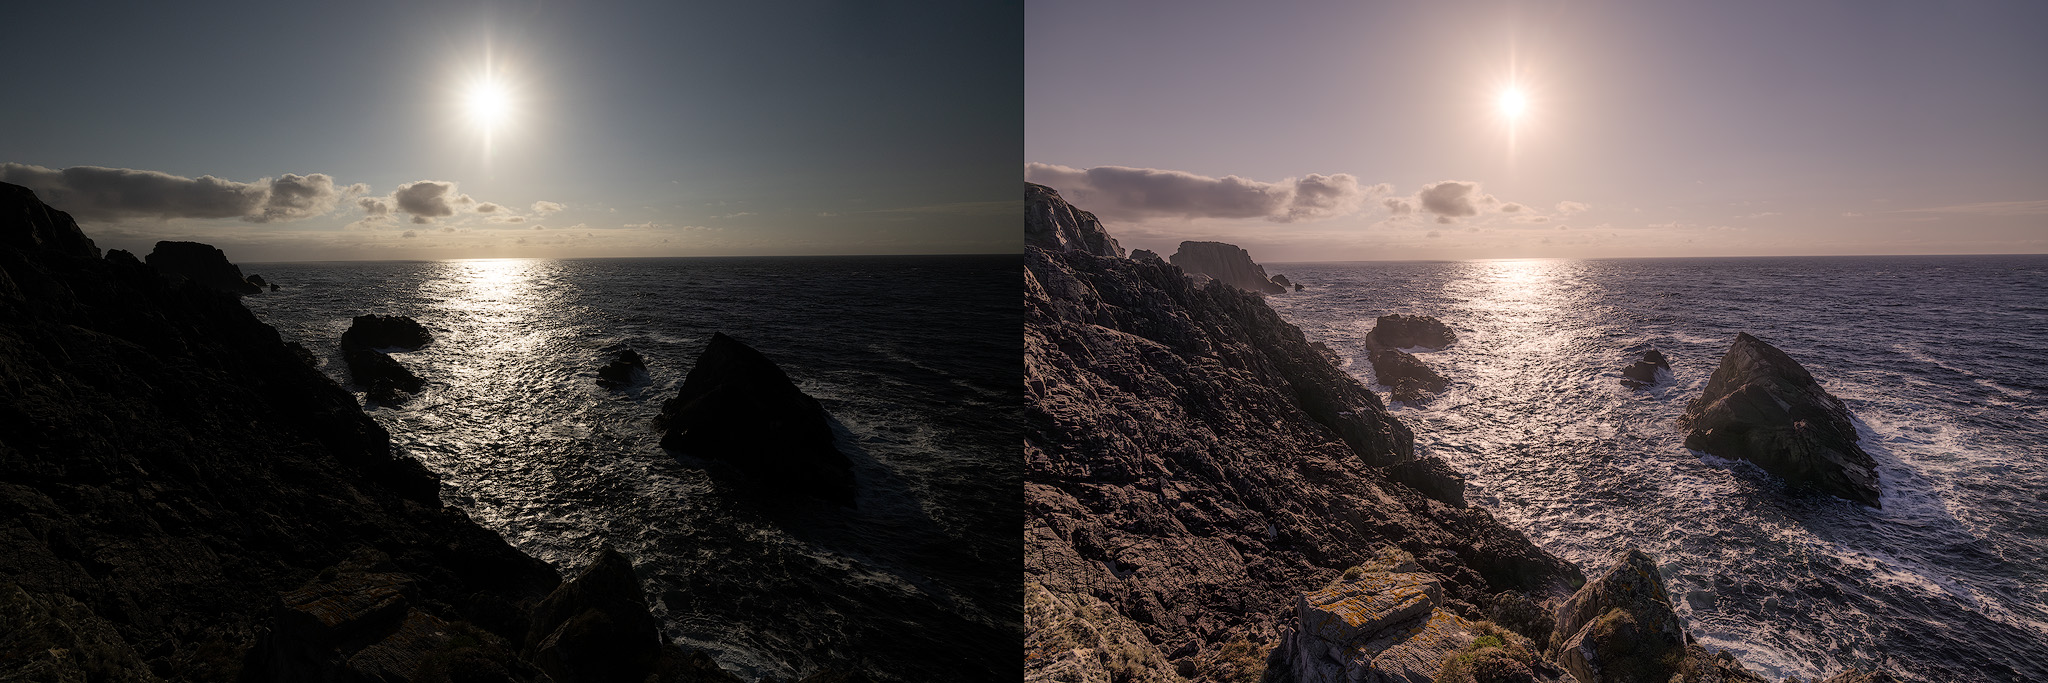
The exposure slider shifts pixel brightness up or down across the whole tonal range. That's usually my first move when editing landscape photos—get the overall brightness right before any targeted work. It recovers detail in bright and dark areas and sets your dynamic range.
Under the hood: brighter pixels get brighter, darker pixels get darker, and the data stretches. Push Exposure too far and you force pixels past their recoverable range. That's when highlights clip and noise shows up in shadows that looked clean a second ago.
The Contrast slider doesn't add punch the way it feels like it does. It pushes bright tones brighter and dark tones darker and compresses everything in between. That's why cranking contrast kills subtle detail—cloud texture, the gradations in a twilight sky. Those midtones get squeezed until they're indistinguishable.
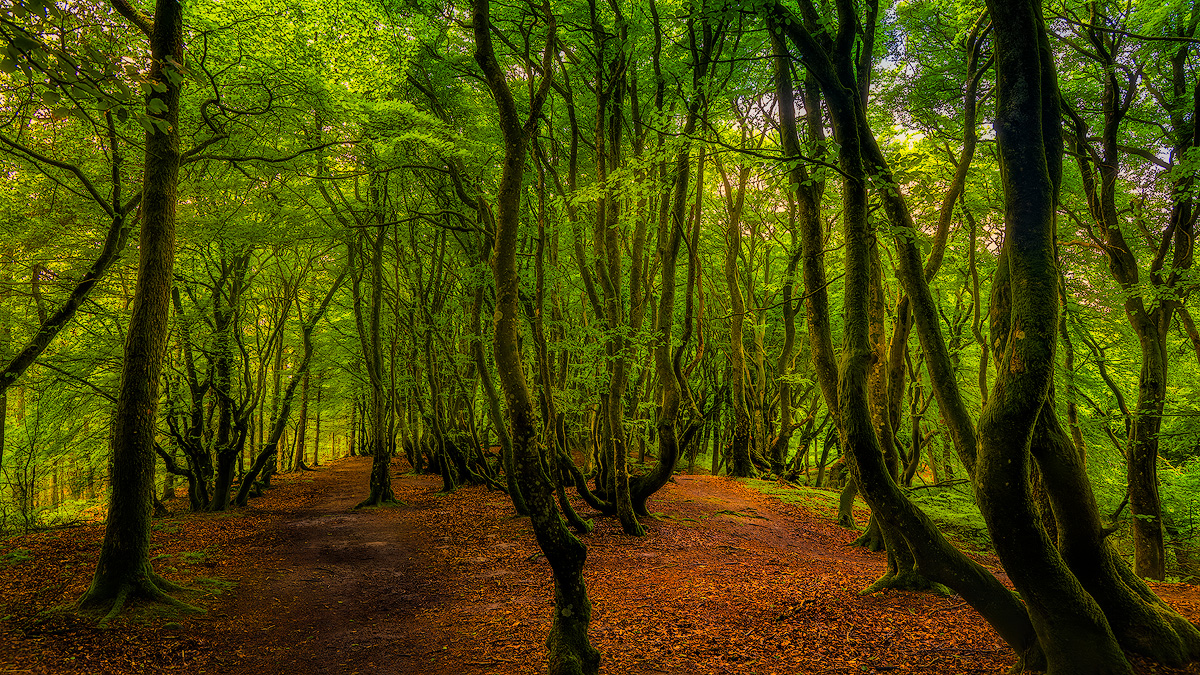
Highlights and Shadows work on tonal ranges, not fixed parts of the image. They're your best tools for balancing a bright sky against a dark foreground. Highlights target the brighter end of the histogram; Shadows target the darker end. When you lift shadows to pull detail out of a forest floor, you're stretching weak signal—pixels that barely recorded any light. That's why aggressive shadow recovery reveals noise that wasn't there before the edit.
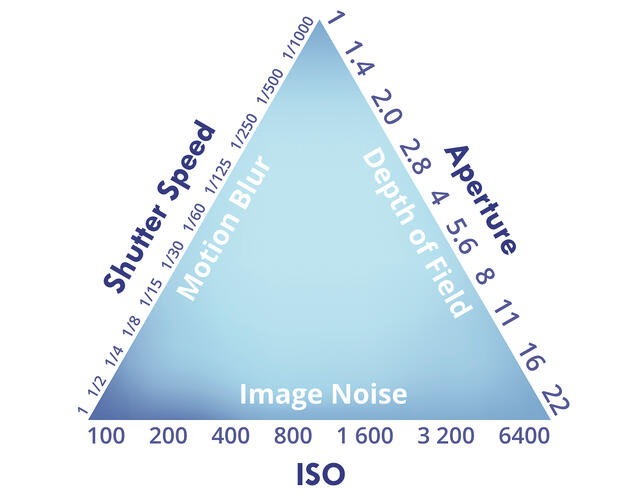
How much noise shows up depends on the ISO you shot at. Lower ISO in the field means cleaner files that need less correction in the edit.
The Tone Curve in Adobe Lightroom: Precision Control for Landscape Editing
The tone curve is one of the most powerful tools in Lightroom and one of the most misunderstood.
A slider applies a uniform adjustment. A curve lets you remap specific input values to specific output values. Every point you set defines how a range of pixel values gets transformed—this is curves adjustment, and it's how you fine-tune tonal values. Want more contrast in the midtones while protecting highlight detail in the clouds? A curve does that precisely. It's the tool for dialing in contrast and tonal values for a balanced, natural-looking landscape photo.
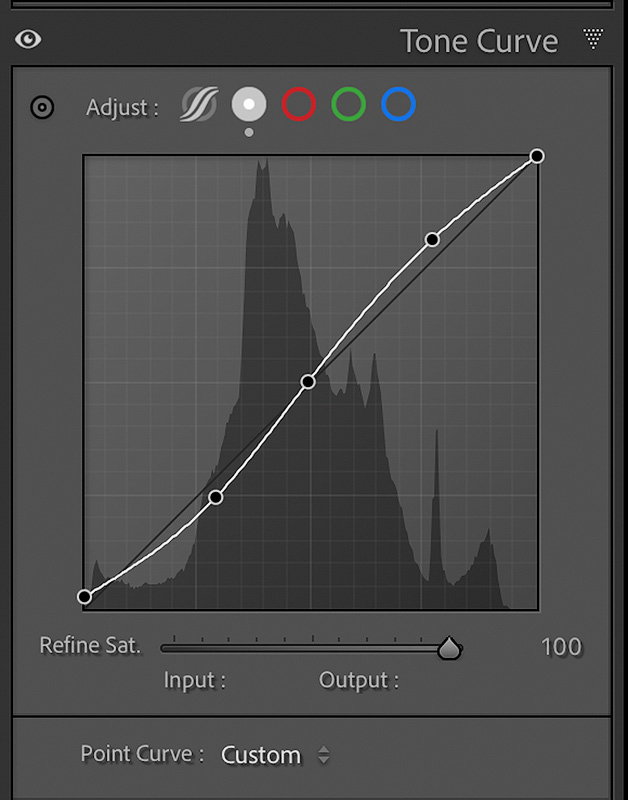
For landscape work, learning the tone curve pays off. A subtle curve holds detail in a sunrise sky far better than a heavy Highlights or Contrast move, because it targets fewer pixels and skips the broad redistribution that causes problems. When I'm working an aurora frame and need to keep subtle color in the sky while holding foreground detail, the tone curve is where I do my most careful work. You can pair it with masks—Lightroom's Select Sky, for instance—to adjust only the sky without touching the rest of the frame.
In Photoshop, a curves adjustment layer gives you even more targeted, non-destructive control, especially combined with masking.
Color Sliders: Working at the Channel Level
Color adjustments work on individual channels—Red, Green, and Blue. Knowing that helps you edit the colors that make landscape and nature photography work, where accurate color matters. Correcting color casts—a blue, yellow, or other tint you didn't want—is the difference between a natural result and one that looks off in landscape photography post processing.
Saturation and Vibrance: When to Decrease Saturation
Saturation increases the distance between all color values and neutral gray equally. It's a blunt instrument—handy sometimes, easy to overdo. Vibrance is smarter: it targets lower-saturation colors first and protects the ones that are already saturated. For landscape work, Vibrance is the safer starting point. When natural light goes flat or a scene gets garish on screen, pull saturation back slightly instead of pushing it—reducing it usually reads as more natural than cranking it up.
HSL sliders (Hue, Saturation, Luminance) let you adjust specific color ranges on their own. Deepen the blue in a mountain lake without touching the warm grasses in the foreground. Shift green foliage to look more natural. Push these too far and you get artifacts—banding, unnatural transitions, hard edges where one color meets another. The Temperature and Tint sliders handle white balance, color casts, and the overall mood of the frame.
Skies and gradients are where color channels break first. Stretch them unevenly and smooth gradations go stepped, transitions look fake, colors shift. I've watched good sunset photos get ruined by over-aggressive color work that turned a real sky into something plastic. Blue hour needs an especially careful hand to keep its natural tones.
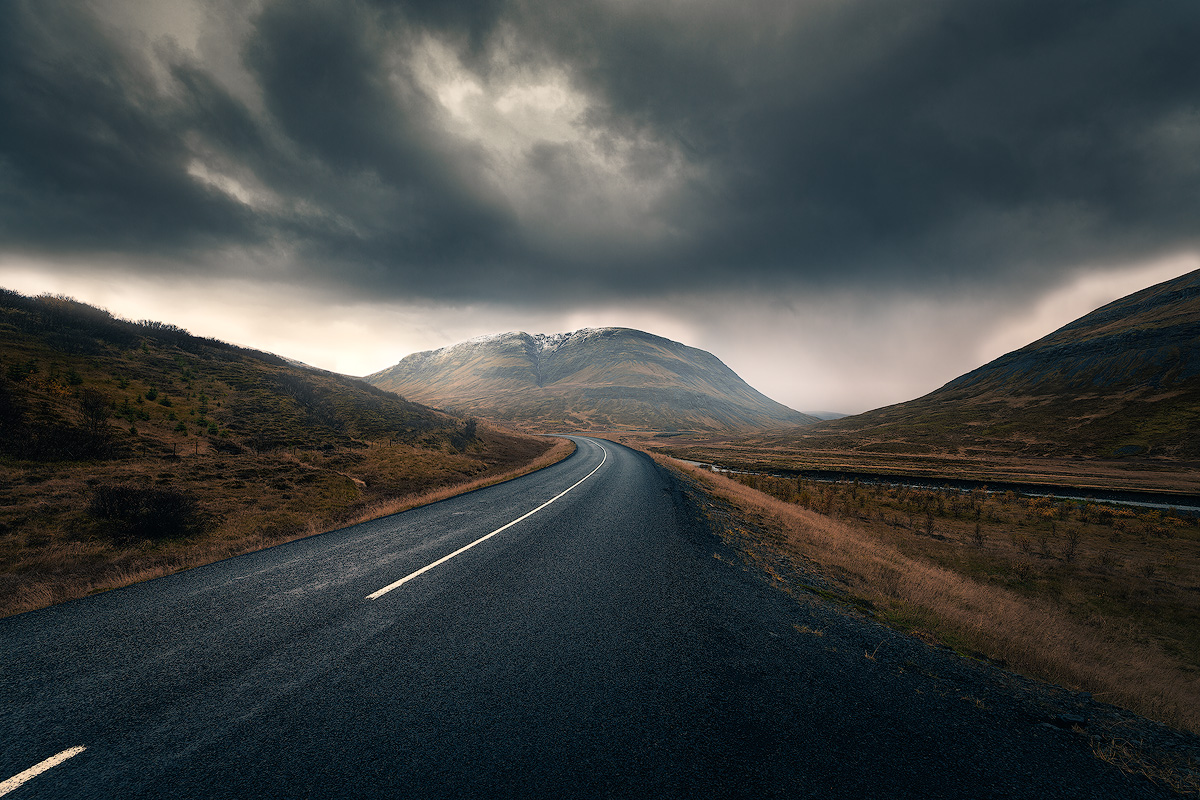
Color correction keeps things accurate. Color grading is where you set mood and intent. For a moody frame, decrease saturation and mute the highlights—muting highlights gives you that cloudy, heavy feel that suits overcast and storm light. Those are the color adjustments that move an image from documentary to interpretive.
Local Adjustments: Smaller Area, Bigger Risk
Healing and cloning tools help remove distracting elements from your landscape photos—a stray branch, a sensor spot, a footprint in the snow—before you commit to heavier local work. Masks, Graduated Filters, and Radial Filters feel safer because they only touch part of the image. Darken just the sky. Brighten just the foreground. Touching less should mean less damage.
For finer control, a black or white brush in Photoshop is essential for precise masking and clean blending, especially during focus stacking. You refine layer masks by hand, deciding exactly which areas your edits hit and getting seamless transitions—the kind of control that matters on complex mountain scenes.
But local adjustments in Lightroom can degrade quality faster than global ones.
Here's why: local edits usually mean stronger adjustments on fewer pixels. You're concentrating the transformation into a small area, which raises the odds of visible transitions, halos along edges, and localized noise. When I'm running a Graduated Filter to balance a bright aurora sky against a dark foreground, I have to watch that I don't push it hard enough to leave an obvious line where the filter ends.
Modern AI masking and edge detection help, but they're approximations built on contrast and color differences. They're not perfect, and the results aren't either when you lean on them too hard.
Types of Masks: Beyond Luminosity
Luminosity masks get the attention, but they're one option among several in Photoshop and Adobe Camera Raw. To get the most out of your edits you need to know the full set and when to use each one.
Layer masks are the foundation of selective editing in Photoshop. A layer mask lets you apply an adjustment to only the areas you choose, controlled by brushing in black or white. You can brighten a flat sky over the Dolomites while leaving the valleys alone, or add contrast to a ridgeline without touching the gradations in your foreground. That precision matters most when the light is dramatic and one heavy-handed move would flatten the thing that made you stop and shoot.
Gradient masks are for smooth transitions—where sky meets land. Blending multiple exposures of a scene at first light, balancing a bright sky against dark foreground, a gradient mask gives you a seamless handoff with no hard boundary. In Adobe Camera Raw you select the Gradient tool and draw it across the frame—good for exposure blending, for dodging and burning along the natural lines of the composition, and for color balance shifts that warm up a morning sky.
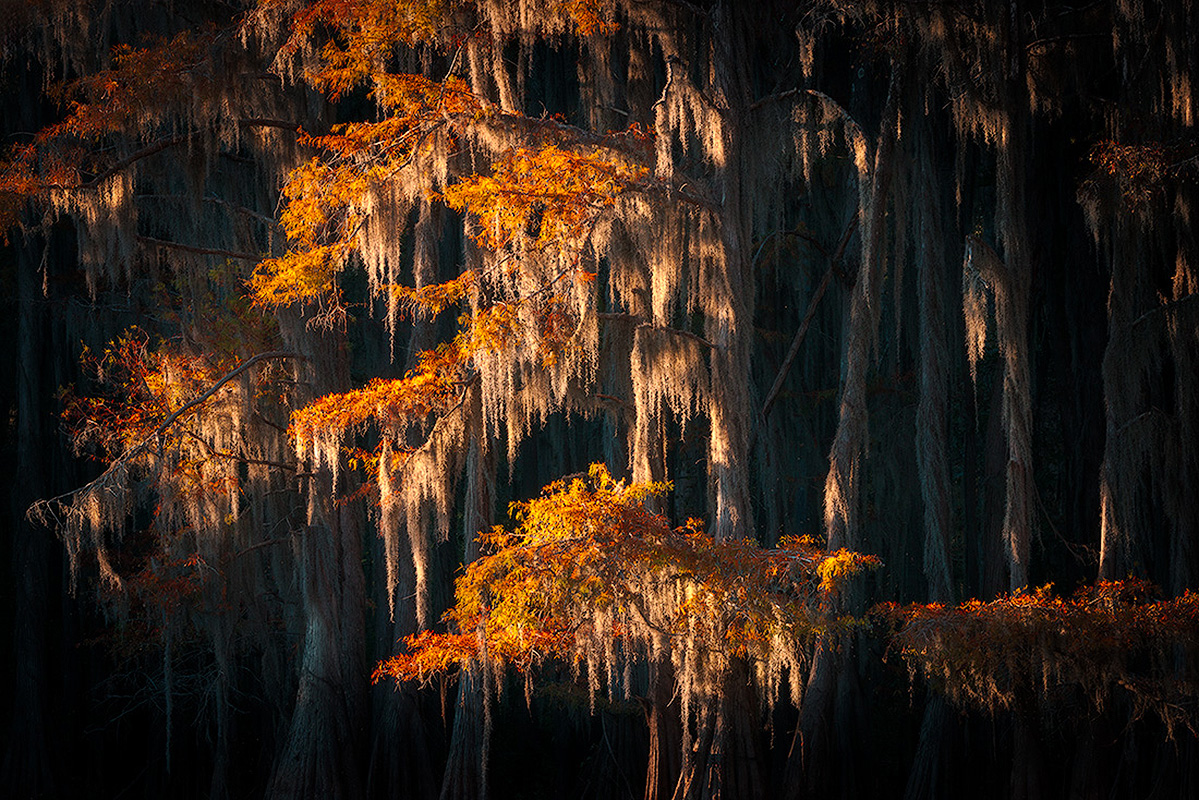
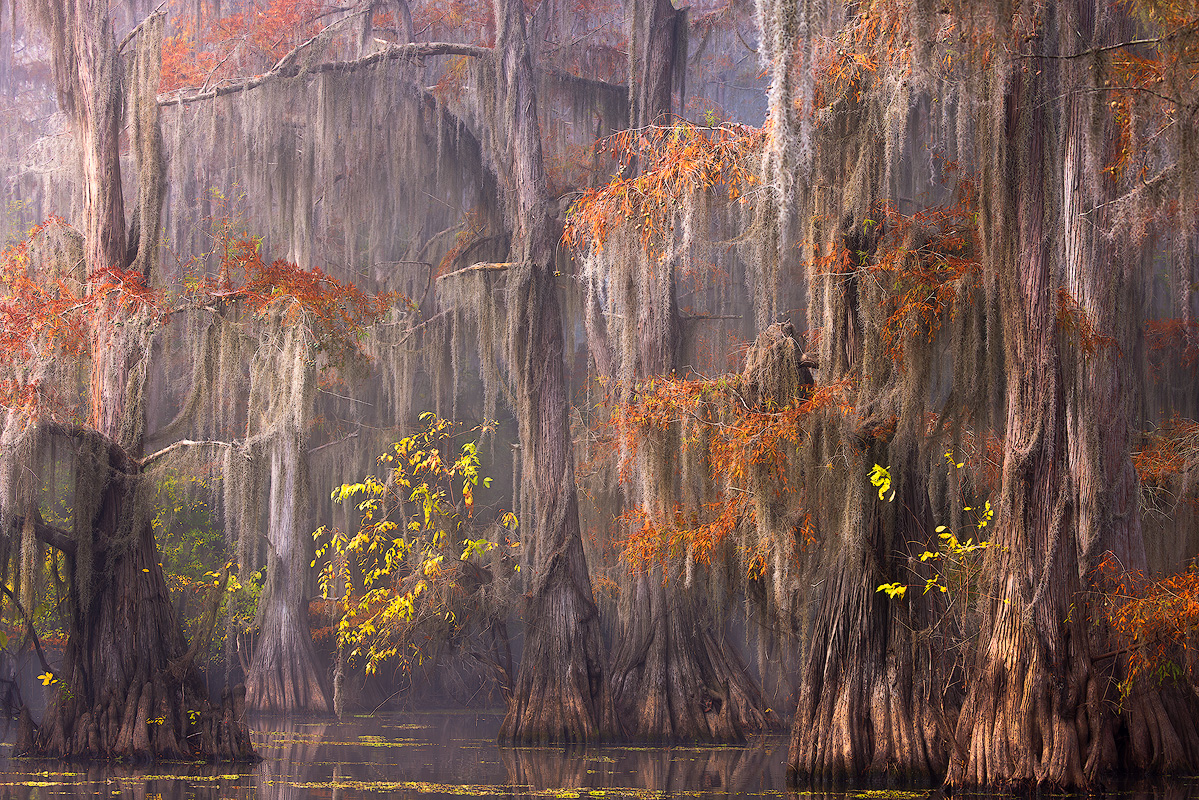
Picture yourself blending multiple exposures of Caddo Lake at first light, balancing that brilliant sky reflecting off still water with the darker cypress silhouettes emerging from morning mist—exactly the kind of scene we explore in depth during a Caddo Lake Texas photography workshop.
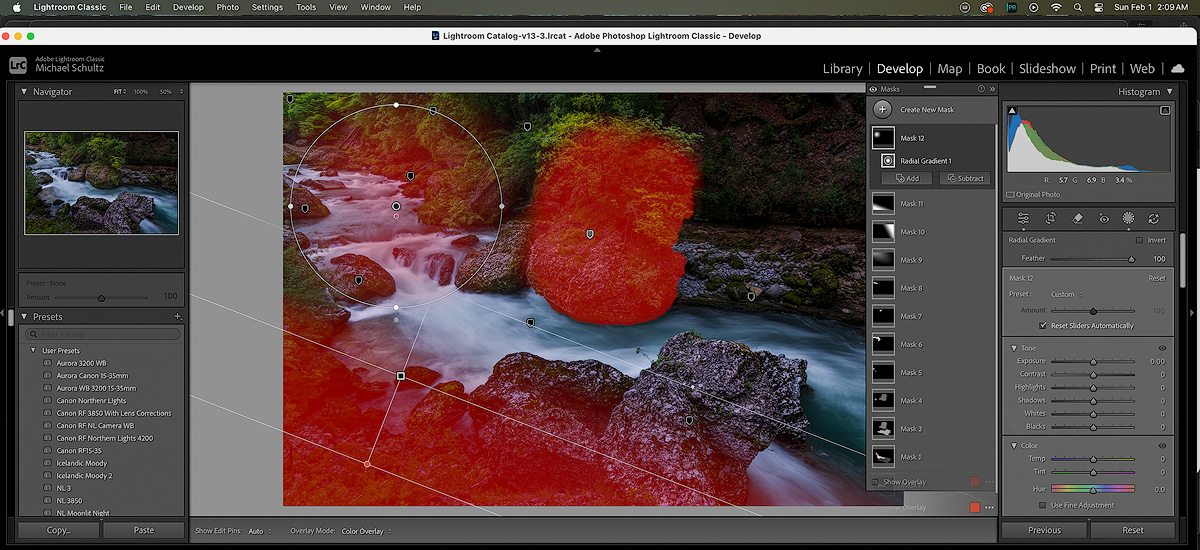
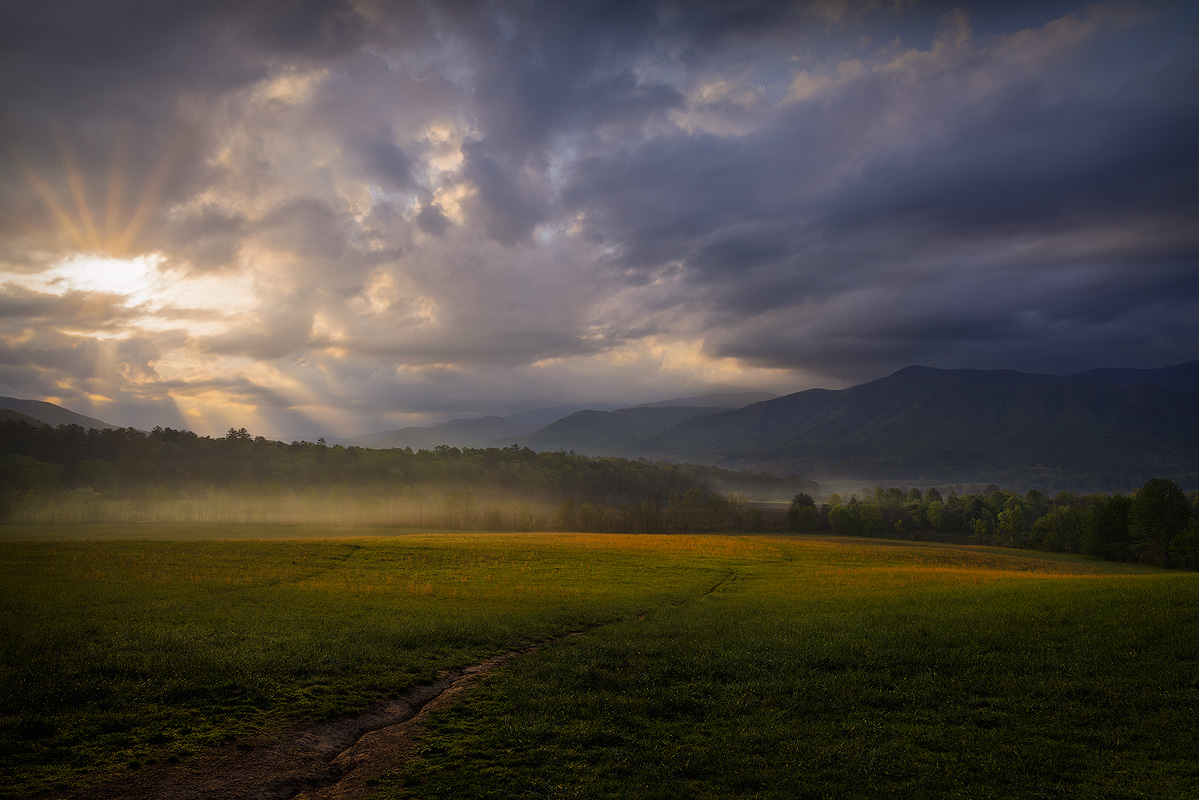
Radial masks are focused and intentional. You isolate one element—sun breaking through storm clouds over a fjord, a stand of aspens catching light while the rest of the forest stays in shadow. The adjustment falls off naturally toward the edges. It pulls the eye where you want it and adds a soft vignette without announcing itself. Both Photoshop and Lightroom make radial masks easy to build and refine.
If you want to push further, panels like the TK9 Action Panel and Raya Pro turn complex masking from tedious technical work into something fast. They build, manage, and refine the masks you need for focus stacking or exposure blending so you can spend your attention on the image instead of the steps.
For focus stacking specifically, dedicated software like Helicon Focus automates the blending and gets you maximum sharpness through a complex scene. Long exposures bring their own editing needs—how long the shutter was open changes the file you carry into post— my shutter speed guide covers how different exposure times affect the files you bring into post-processing.
Once you understand how to build masks, refine them, and stack them, you open up control well past basic exposure correction. And it stays non-destructive—your RAW file is untouched while you work, so you can always start over.
Masking is where a lot of your personal style lives. Whether you're blending captures for full dynamic range, adjusting only the sky over an Arctic peak, or working a midtones mask for a subtle contrast shift, the right mask gives you the control to turn what you saw into the final image.
So experiment. Combine these tools. Figure out how they help you show the way you see a place—because that's the part no one else can copy.
Luminosity Masks: The Next Level of Precision Control
Luminosity masks are an advanced landscape photography post processing technique, and they require a solid grip on layers and masks. If you want real control over specific tonal ranges—adjusting only highlights, midtones, or shadows, or specific areas of the image—luminosity masks are the answer.
A luminosity mask is a selection built from the actual brightness values of the pixels in your image. Where a Graduated Filter draws a straight line across the frame and doesn't care what it crosses, a luminosity mask follows the tonal boundaries already in the photo. It's self-feathering—the transitions are built into the selection based on how bright or dark each pixel is.
Here's why that matters for landscape work:
Highlight control without halos. Want sky detail back without touching the sunlit snow on a ridge? A highlights luminosity mask selects only the brightest pixels with a smooth falloff into the midtones. No hard edges, no halos around tree branches against the sky.
Shadow recovery that stays clean. Lift shadows with a mask targeting your darkest tones and the adjustment only lands where it's needed—its strength varies with how dark each pixel is. You get less noise than a flat Shadows slider push.
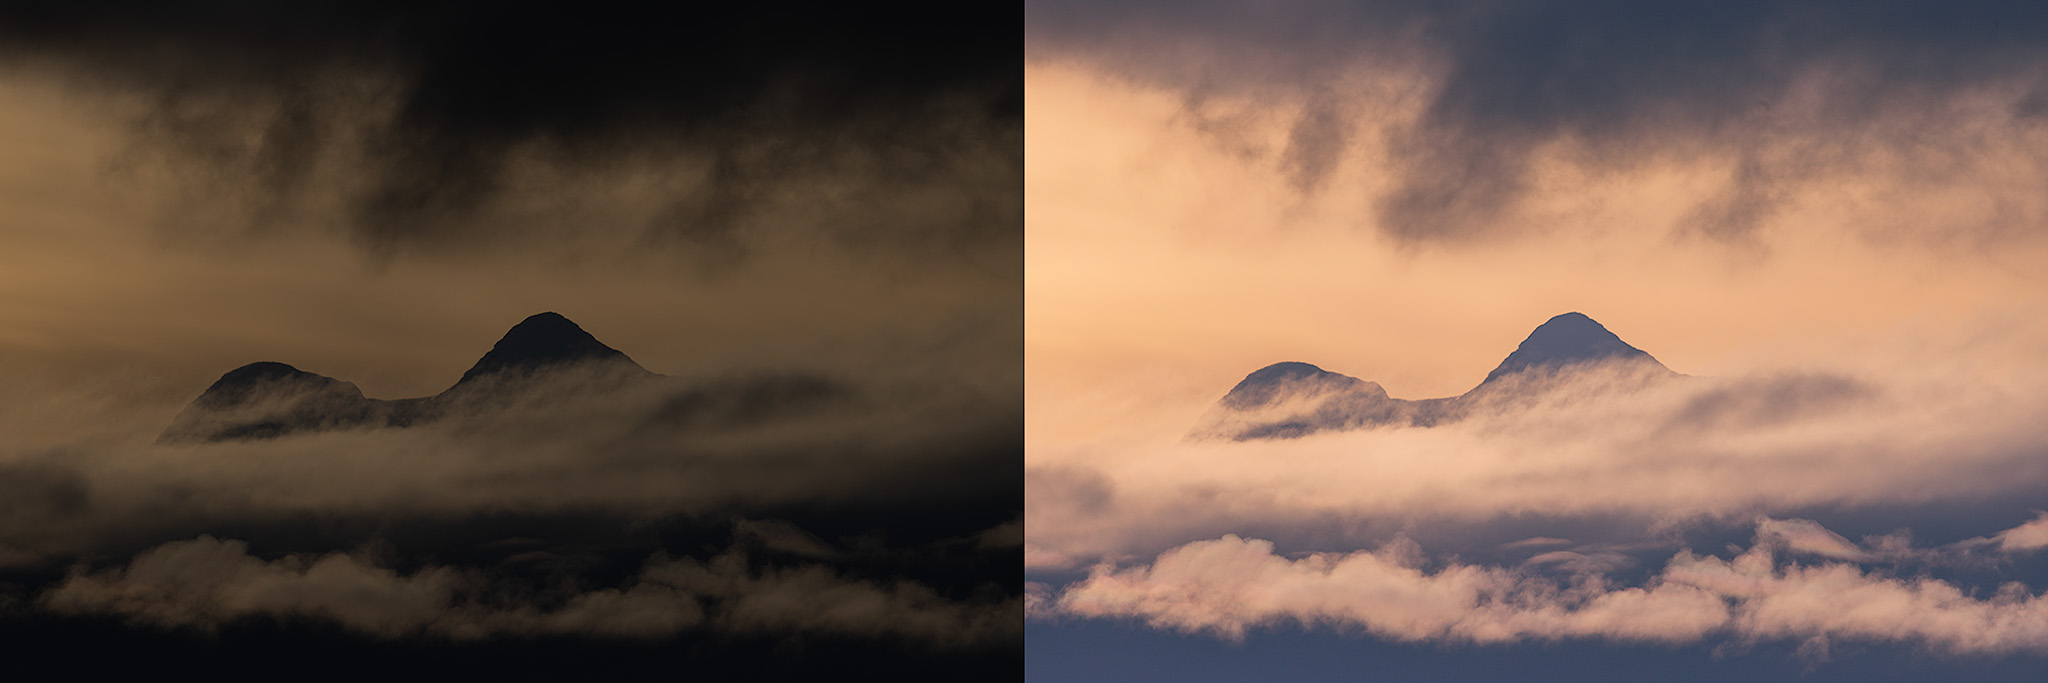
Midtone separation. This is where luminosity masks earn their keep. Target just the midtones to add contrast or color without blowing highlights or crushing shadows. The texture in clouds, the gradations in fog moving through a valley—midtone masks let you work those without touching the extremes.
Luminosity masks are mostly a Photoshop technique, built from selections off the image's color channels. You can make them by hand with channel intersections and calculations, or use panels like Tony Kuyper's TK Panel or Lumenzia to build and manage them fast. The same steps work for highlights, midtones, or shadows, which keeps the workflow consistent. If you're serious about landscape photography post-processing and want to go past Lightroom's built-in masking, luminosity masks give you complete control and are one of the best investments you can make.
The learning curve is real. But once it clicks that a mask is just another way of targeting specific pixel values, the rest follows. It's the same remapping I've been describing—you're just being far more precise about which pixels get the transformation.
Working with Multiple Exposures
Some scenes hold more range than a single frame can. Morning light hitting distant peaks while the valleys are still in deep shadow. Storm light breaking over a coastline. The dynamic range runs past what one exposure can record. These are high-contrast scenes, and that's where I bracket.
Single exposures are easier to edit than multiple exposures, but one frame often can't hold the full range of a high-contrast scene. So I shoot several exposures at different levels to capture the whole range of light.
Three frames of the same composition: one for the highlights, one for the midtones, one that opens up the shadows. The work happens later, in post, where those frames become one image that holds the full range from light to dark.
I start with auto-alignment in Photoshop so the layers register—there's always a little movement when you're shooting off rock or snow. Then curves adjustment layers pull the character out of each exposure. But the real work is the luminosity masks. They read the brightness of every pixel and let me blend exposures along the file's own logic—holding structure in bright clouds without losing the dark of a forest floor.
You can also merge the brackets directly in Lightroom to create an HDR image that keeps detail in both highlights and shadows.
The point isn't technical correctness for its own sake. It's matching the file to what the scene actually held—the full range of light, recovered and put back together. After enough seasons it becomes routine, like reading the weather.
Using Dodge and Burn
Dodging and burning go back to the darkroom. In landscape work they're more than cleanup—they're how you direct attention, building depth and guiding the eye through the frame.
The setup in Photoshop is simple: make a neutral gray layer, set its blend mode to Soft Light or Overlay, and you've got a surface for shaping light. A soft black brush darkens—deepening the weight of storm clouds, adding gravity to the base of a ridge. A white brush lifts—pulling light onto a sunlit summit or off water at dawn. Build it slowly. Every move should be subtle, following how the light actually fell on the scene.
Done right, you emphasize what matters in the frame—the interplay of light and land that made you stop. You're building visual paths into the scene, adding contrast where it earns it. Lift valley mist at first light, deepen the shadows under a stand of trees—dodge and burn become part of how you see.
The skill is less about technique and more about knowing how light behaves on stone, water, and sky, then using that to shape an image that carries the weight of the place.
Helpful Photoshop Shortcuts
Photoshop's menus and panels can pull your focus away from the image. Keyboard shortcuts keep your hands moving and your attention on the photo instead of the interface. These are the ones I reach for in landscape work:
- Ctrl+Shift+L (Mac: Command+Shift+L): Loads a luminosity mask as an active selection—direct access to the brightest, mid, or darkest tones without hunting through menus.
- Ctrl+Shift+R (Mac: Command+Shift+R): Creates a curves adjustment layer, the fastest way to start shaping contrast and tone.
- Ctrl+Shift+M (Mac: Command+Shift+M): Adds a layer mask to the active layer for selective editing—this ridge gets the adjustment, that valley doesn't.
- Ctrl+Shift+E (Mac: Command+Shift+E): Merges your adjustments into a single layer when you're ready to commit.
These aren't just time-savers. They let you experiment freely with masks and adjustments, and once they're in muscle memory your editing gets faster and more responsive to each image.
Non-Destructive Editing Doesn't Mean Unlimited Editing
Lightroom and most modern RAW editors are non-destructive—your original file never gets overwritten. That's useful: you can always reset and start over. But it doesn't mean your image data has no limits.
Extreme edits push pixel values past where they can recover. Once highlights clip to pure white or shadows crush to pure black, that detail is gone whether or not you can undo the slider. The RAW file still holds the original data, but if your edit asks for something the data can't support, the damage shows in every export.
To avoid over-editing: review with fresh eyes, take breaks, and always work non-destructively. It keeps your images natural and stops you from pushing too far.
Re-editing exported JPEGs makes it worse. Every JPEG save loses information to compression. Edit and re-export that file again and the losses stack up.
Treat non-destructive editing as reversible instructions, not unlimited quality. You can always undo the instruction, but the result still has to fit inside what your original capture actually contains.
Your Landscape Photography Post Processing Workflow: Why Editing Order Matters
Each slider changes data the next one depends on, so the order of your post-processing workflow matters more than most photographers think. Big global changes early narrow the range of usable data for everything that follows.
Before you edit, transfer images using a card reader for faster speeds and organize them in folders named by date and title—Lightroom can automate the transfer and import. Then use the library module in Lightroom to sort and manage your library with folders, keywords, star ratings, color labels, and collections, which keeps large batches of landscape photos manageable.
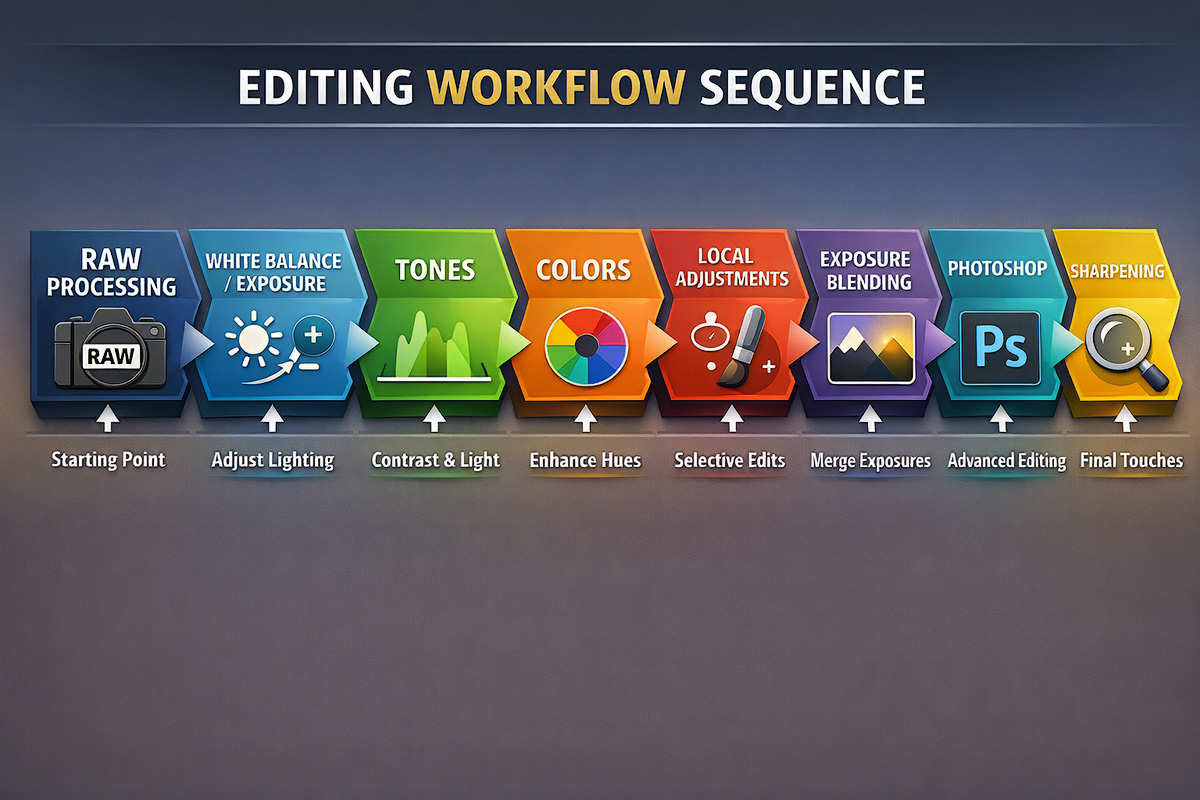
A solid landscape photography editing workflow generally runs in this order:
- Initial RAW processing in Lightroom or Camera Raw: turn on Enable Profile Corrections and Remove Chromatic Aberration to fix lens distortion and fringing up front.
- White balance and exposure first to set your foundation.
- Shape tones (Highlights, Shadows, Whites, Blacks) before Contrast or Clarity.
- Color adjustments once tones are set. In Lightroom, develop images in the develop module—sliders, masking, and camera calibration.
- Local adjustments in Lightroom (Graduated Filters, Radial Filters, Brush) for first-pass refinement.
- Exposure blending if you need to combine frames for dynamic range, using a darker exposure to hold highlight detail.
- Crop to refine the composition and aspect ratio.
- Move to Photoshop: open the layers you want to blend, run Auto-Align Layers, pick a base image, and use the others for targeted work.
- Luminosity mask work in Photoshop for precise tonal and color control—surgical adjustments to highlights, shadows, or midtones without the bleed standard masks create.
- Sharpening and noise reduction last, since they work best on data that's already in its final tonal state.
This order minimizes data stretching and keeps the most usable information through the whole edit. Luminosity masks come after your basic Lightroom work but before sharpening—you want the tonal foundation set before precise masked moves, and you don't want to sharpen data you're still going to change.
A few habits: work non-destructively, use virtual copies to experiment, and zoom in to check details as you go.
Enhancing Image Details: Sharpening, Texture, and Clarity
The details—veins in a leaf, lichen on a boulder, the edge where a peak meets the sky—are what give a landscape photo presence. Sharpening, texture, and clarity are how you bring them out in post.
Sharpening increases contrast along edges to make detail crisper. In landscape work it can take a slightly soft capture to print-sharp—tree branches, sand grain, the outline of distant peaks. But it cuts both ways: push too far and you get halos, amplified noise, and a brittle look. Apply it selectively and last, after all tonal and color work, and use masking to hit foreground rock and foliage while leaving smooth skies alone.
Texture is a newer slider in Lightroom, built to enhance or soften medium-sized detail without touching the whole image. Unlike sharpening, which works at the edge level, texture brings out surface—bark on a spruce, ripples in a dune. Use it lightly; a gentle push adds depth, a heavy hand makes things look harsh.
Clarity adjusts midtone contrast for a punchier, more dimensional look—good for structure in clouds, rock, and water. But it affects the whole image and tips into over-editing fast, flattening transitions and exaggerating noise in the shadows. For most landscape photos a modest clarity boost is plenty. For mist, soft light, or subtle gradients, pull clarity down to hold the mood.
Editing in 8-bit vs 16-bit: What Landscape Photographers Need to Know
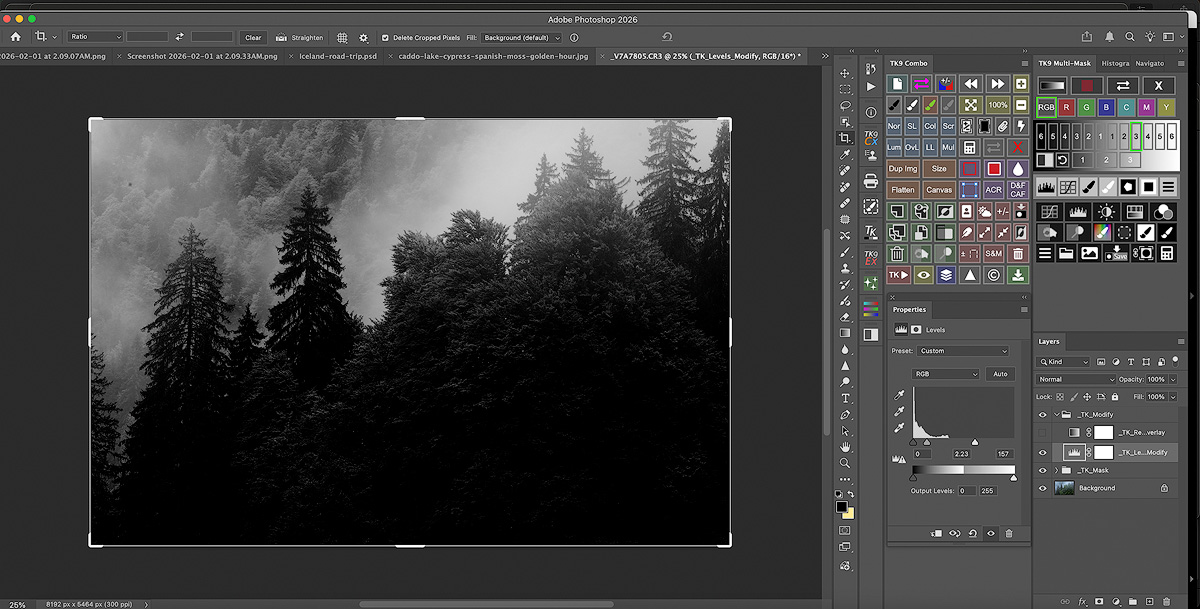
The difference between editing in 8-bit and 16-bit color depth has a real effect on your final image. It matters most when you're building a black and white version of a landscape, where smooth tonal transitions carry the whole frame. Both Lightroom and Photoshop support 16-bit—how and when you use it is what counts.
Fine-art work in particular leans on 16-bit to hold the delicate gradations that define the look.
What Does Bit Depth Mean?
Bit depth is how much color information is stored per channel. An 8-bit image holds 256 levels per channel (Red, Green, Blue); a 16-bit image holds 65,536. That jump means 16-bit files carry far more subtle color and brightness information—which matters most on high dynamic range landscapes.
Why Editing in 16-bit Matters for Landscape Photography
Landscapes run a wide tonal range—deep shadow in a forested valley up to bright sky over a sunlit peak. Editing in 16-bit preserves that range and cuts the risk of posterization, where smooth gradients go banded in skies and shadows.
Complex edits—curves adjustment layers, exposure blending, luminosity masks—come through cleaner in 16-bit, without the quality loss you'd get in 8-bit. That's what keeps the natural, smooth tonal transitions in a finished landscape.
Lightroom and 16-bit Editing
Lightroom processes RAW images in a high bit-depth internal format, so you're effectively editing at 16-bit precision. Exposure, contrast, color balance, and local edits all apply with minimal quality loss, and the workflow stays non-destructive—your RAW file stays intact while adjustments are stored separately.
Lightroom exports at 8-bit or 16-bit depending on your output format. For most web and print, 8-bit TIFF or JPEG is standard, but if you're taking the file into Photoshop for more work, export a 16-bit TIFF to hold maximum quality.
Photoshop: Choosing 8-bit or 16-bit Mode
Photoshop opens and edits in 8-bit, 16-bit, or 32-bit. For landscape post-processing, 16-bit is the balance of quality and manageable file size.
8-bit is fine for minor touch-ups or web-sized images, but it risks losing tonal detail under heavy adjustments—curves, dodge and burn, exposure blending—showing up as banding or color shifts in smooth gradients like skies and water.
Switch to 16-bit before detailed edits for full control over tonal values and transitions. Convert back to 8-bit for final export if you need to.
How to Work with 16-bit Files Efficiently
16-bit files are larger and heavier to process, so keep the workflow lean:
- Use smart objects to keep edits non-destructive and adjustable.
- Flatten or merge layers only after you're done editing.
- Save working files as TIFF or PSD to keep the 16-bit data.
- Convert to 8-bit on export for web or print to cut file size without visible quality loss.
Summary of Key Points
Editing in 16-bit through the whole workflow—from RAW conversion in Lightroom to masking and adjustment layers in Photoshop—holds quality, tonal smoothness, and color fidelity. It matters most on high dynamic range scenes and complex edits like exposure blending and luminosity masking.
Knowing when to use 8-bit versus 16-bit is part of the difference between a good landscape image and a great one.
Edit With Intent, Not Guesswork
Once you see Lightroom sliders as mathematical transformations instead of magic, you edit landscape photos differently. Fewer extreme moves. More targeted corrections. You reach for luminosity masks when you need precision the standard tools can't give you. And you recognize when a file is running out of usable data before you push it into visible damage.
Knowing the common post-processing mistakes is part of it—spotting them is how you keep the quality up.
I've spent more than twenty years out in Alaska—standing under the northern lights, in the first light of a cold sunrise, in a lot of moments where I knew the scene in front of me was worth getting right. All of it comes back to processing that data with respect.
The time you put in standing in the field deserves that respect in post. Understanding what's happening to your image data when you move a slider is part of it. So is your own eye—your read on a place is what should drive your editing decisions and make the images yours.
The goal isn't to avoid editing hard when a photo calls for it. It's to know exactly what you're asking the software to do, so you make those calls on purpose instead of finding out after the fact.
The best landscape photographers aren't the ones who know every slider. They're the ones who know when to stop.
Happy editing as you apply these techniques to your own images! And if you have questions about how these ideas apply to your specific work or a particular workshop you’re considering, don’t hesitate to reach out via the contact page.
Landscape Photography Post Processing: Frequently Asked Questions
How do you edit landscape photos in Lightroom?
Edit landscape photos in Lightroom's develop module, working in a deliberate order: set white balance and exposure first, shape your tones with the Highlights, Shadows, Whites, and Blacks sliders, then make color adjustments and local adjustments. Lightroom develops RAW images non-destructively, so your raw file stays intact while your edits are stored separately. The develop module gives you sliders, masking tools, and camera calibration to enhance your images.
What actually happens when you move a slider in Lightroom?
When you move a slider, Lightroom performs a mathematical transformation on your image data. Each pixel holds numerical values for brightness and color, and the slider remaps those values—the Exposure slider shifts pixel brightness up or down, the Contrast slider pushes bright tones brighter and dark tones darker. You're not adding light to the photo; you're telling the software to reinterpret numbers that already exist. Push a slider too far and you force pixels beyond their recoverable range.
Should you shoot RAW or JPEG for landscape photography?
Shoot RAW. A RAW file holds the full data from your camera sensor with minimal processing, preserving the dynamic range you need to recover shadow detail and pull back blown highlights. The JPEG format has already altered, compressed, and permanently discarded much of that data before you open the file, so JPEGs have limited post-processing flexibility for adjustments like white balance and color. More data means more room to edit without visible damage.
What order should you edit landscape photos in?
Before editing, transfer images using a card reader for faster speeds and organize them in folders named by date and title. Then edit in this order: initial RAW processing and lens corrections, white balance and exposure, tone shaping (Highlights, Shadows, Whites, Blacks), color adjustments, local adjustments, exposure blending, and sharpening and noise reduction last. Editing in this order minimizes data stretching and preserves the most usable image data throughout your post processing workflow.
Should you edit in 8-bit or 16-bit for landscape photography?
Edit in 16-bit. An 8-bit image holds 256 levels per color channel, while a 16-bit image holds 65,536 levels—that difference preserves smooth tonal gradations and reduces posterization, where gradients in skies and shadows become banded. Working in 16-bit matters most for high dynamic range scenes and complex edits like curves, exposure blending, and luminosity masks. Convert back to 8-bit only for final web or print export.
What are luminosity masks in landscape photography?
Luminosity masks are selections based on the actual brightness values of the pixels in your image. Unlike a graduated filter that draws a straight line across the frame, luminosity masks follow the natural tonal boundaries already in your photo, and they're self-feathering, so transitions stay smooth. They give you complete control to recover highlights, lift shadows cleanly, or separate midtones—targeting specific areas without halos or amplified noise.
Want to take your landscape photography skills further—both in the field and in post-processing? Check out my upcoming photography workshops where we cover everything from camera settings to Lightroom workflow and luminosity masking techniques in a hands-on environment.